This article explains how students will go through the course request process from the Student Portal in order to help office staff give support if a student needs help or asks a question.
What students will see
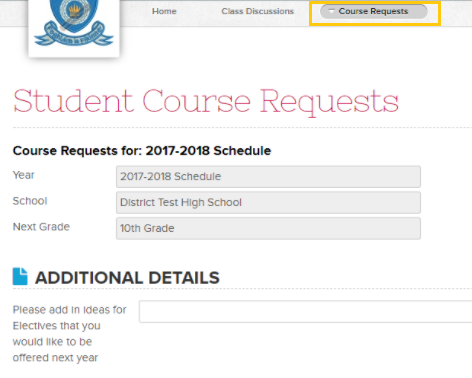
Once Course Requests have been activated in the Master Scheduler, Course Requests tab will appear in the Student Portal:
Adding their Course Requests
This is where students will be able to select their course requests. They will only have access to submit course requests based on the groups created for their grade level under “Configure Course Request Templates” (and based on courses in the course offering). Please see Configure Course Request Templates for more info.
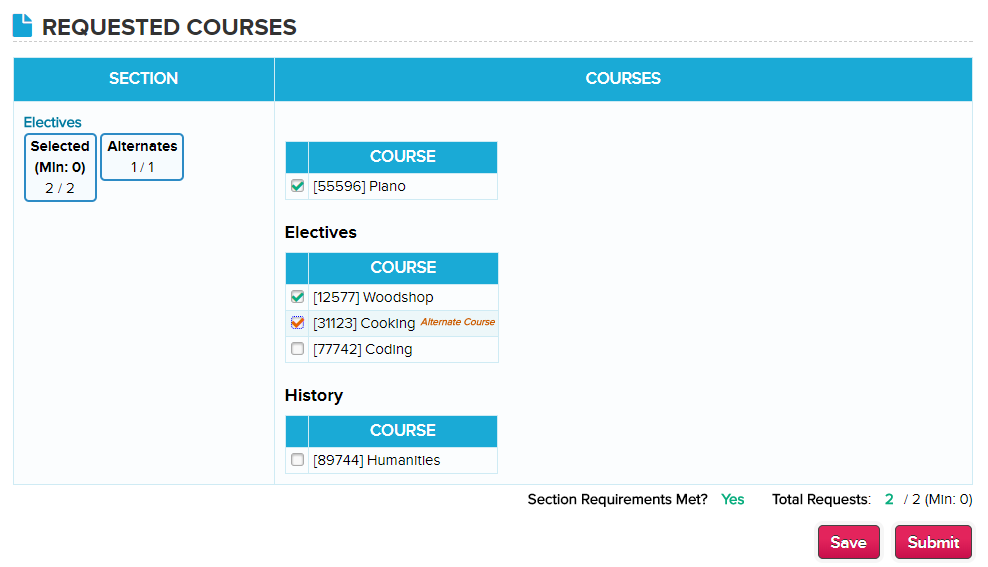
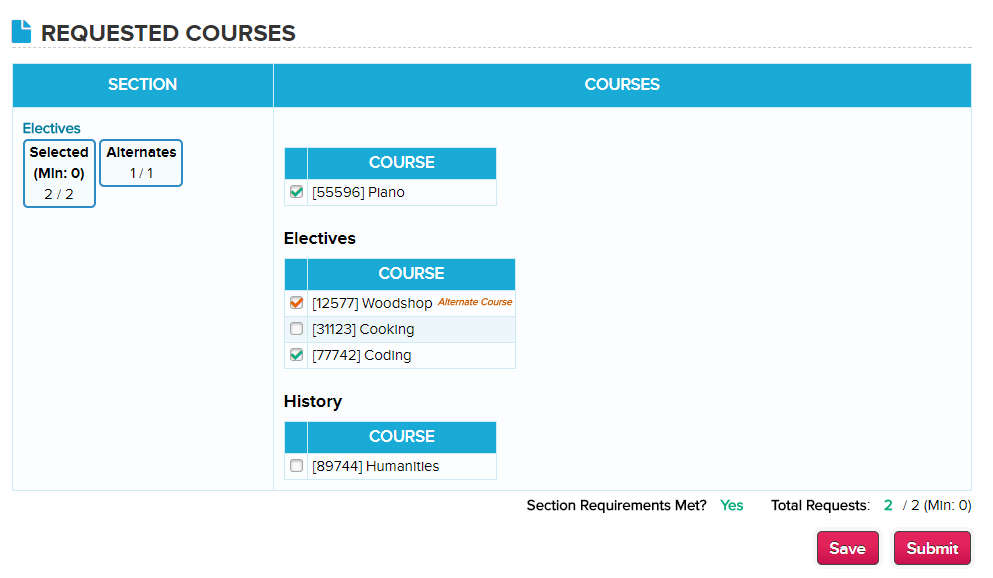
Adding Course Request: To add a course request, a student must check the box next to the appropriate course.
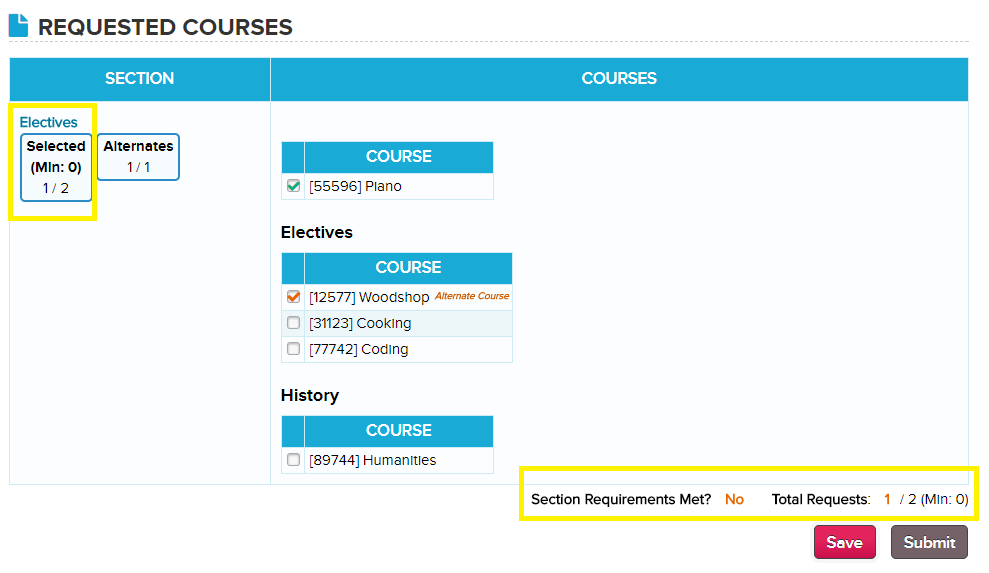
Alternative Courses: Student must click in the checkbox twice in order to make the course an alternative selection.
Removing Course Request: To remove a course request the student must check the box next the course until the check mark in removed.
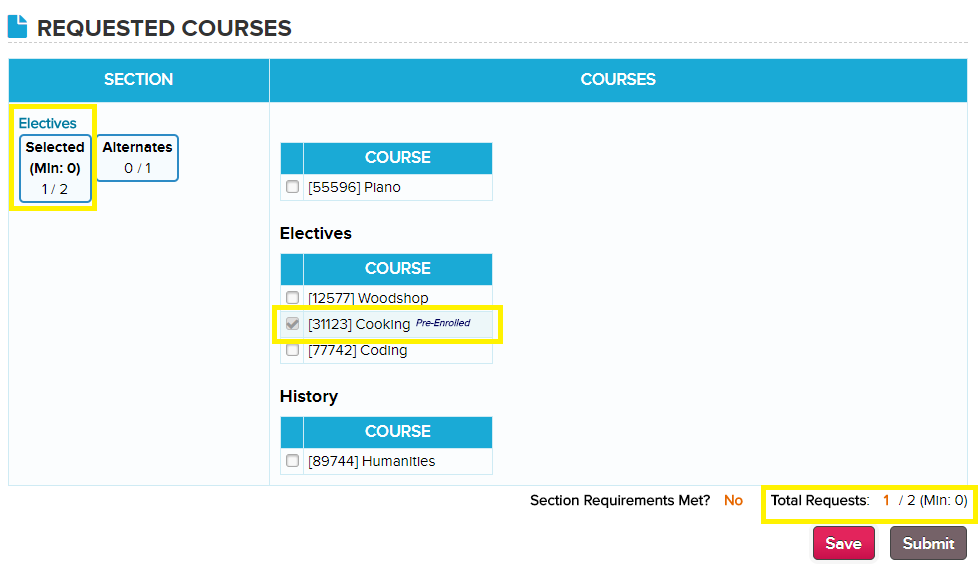
Pre-enrolled Courses: Some students may have courses requests that have been added by a teacher/counselor. Anything that is preassigned for a student will be locked so that students cannot make changes to them. Pre-enrolled courses that are a part of a group for a course request template will count towards the total for the group:
Submitting Course Requests
Student cannot submit course requests until all requirements are met based on the course request template. The button is greyed out until section requirements are met:
Once section requirements have been met, the “Submit” button will be clickable and the student will be able to submit:
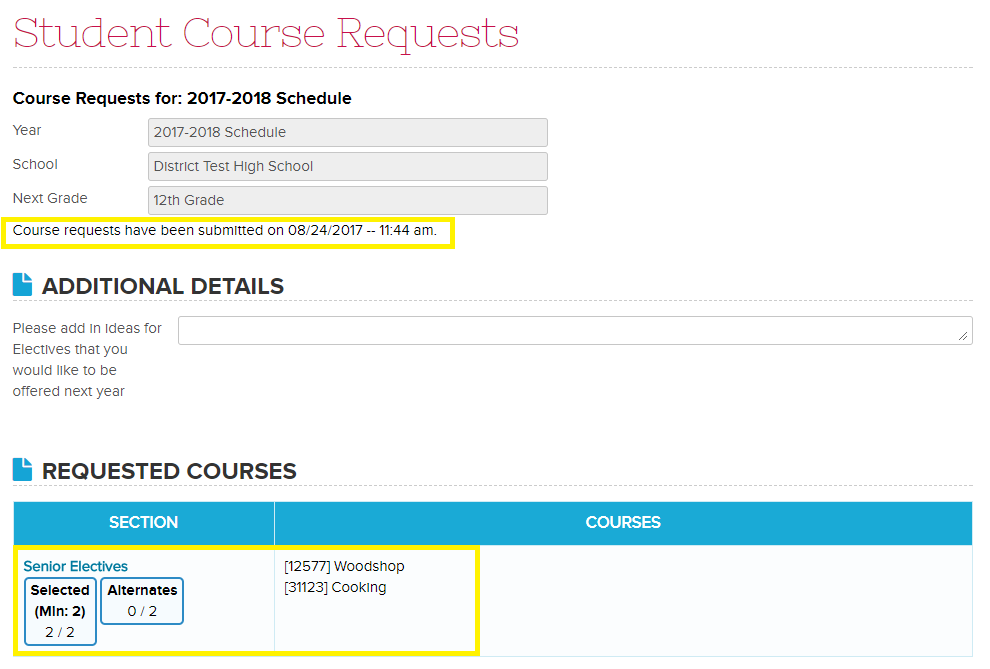
Once the student has submitted courses requests, there will a notification along with a timestamp showing when the requests were submitted. The student will also be able to see the courses he/she requested for:
17EH1221