Master Scheduler has two levels of configuration for every class that a student takes. Classes are broken down first into courses ("Algebra I") and then again into sections ("P3 Algebra I"). This allows for two complete levels of information and many more configuration options as a result. Let's take a look at how these two components of Master Scheduler interact.
Courses
Top-level information is configured in the Master Scheduler module in the Courses section. Here, administrators can set more general parameters such as Course Name, grade-levels allowed to enroll in the course, number of students allowed in any given section, credit hours, course length, subject area, etc. Parameters set at the course-level apply to all sections by default when the sections are created.
Courses can be configured at the District level or at the school level - the interface is the same. Here is the process for adding a course:
- Go to the Master Scheduler Module, then select the School Settings tab.

- Next select the "Configure Courses"
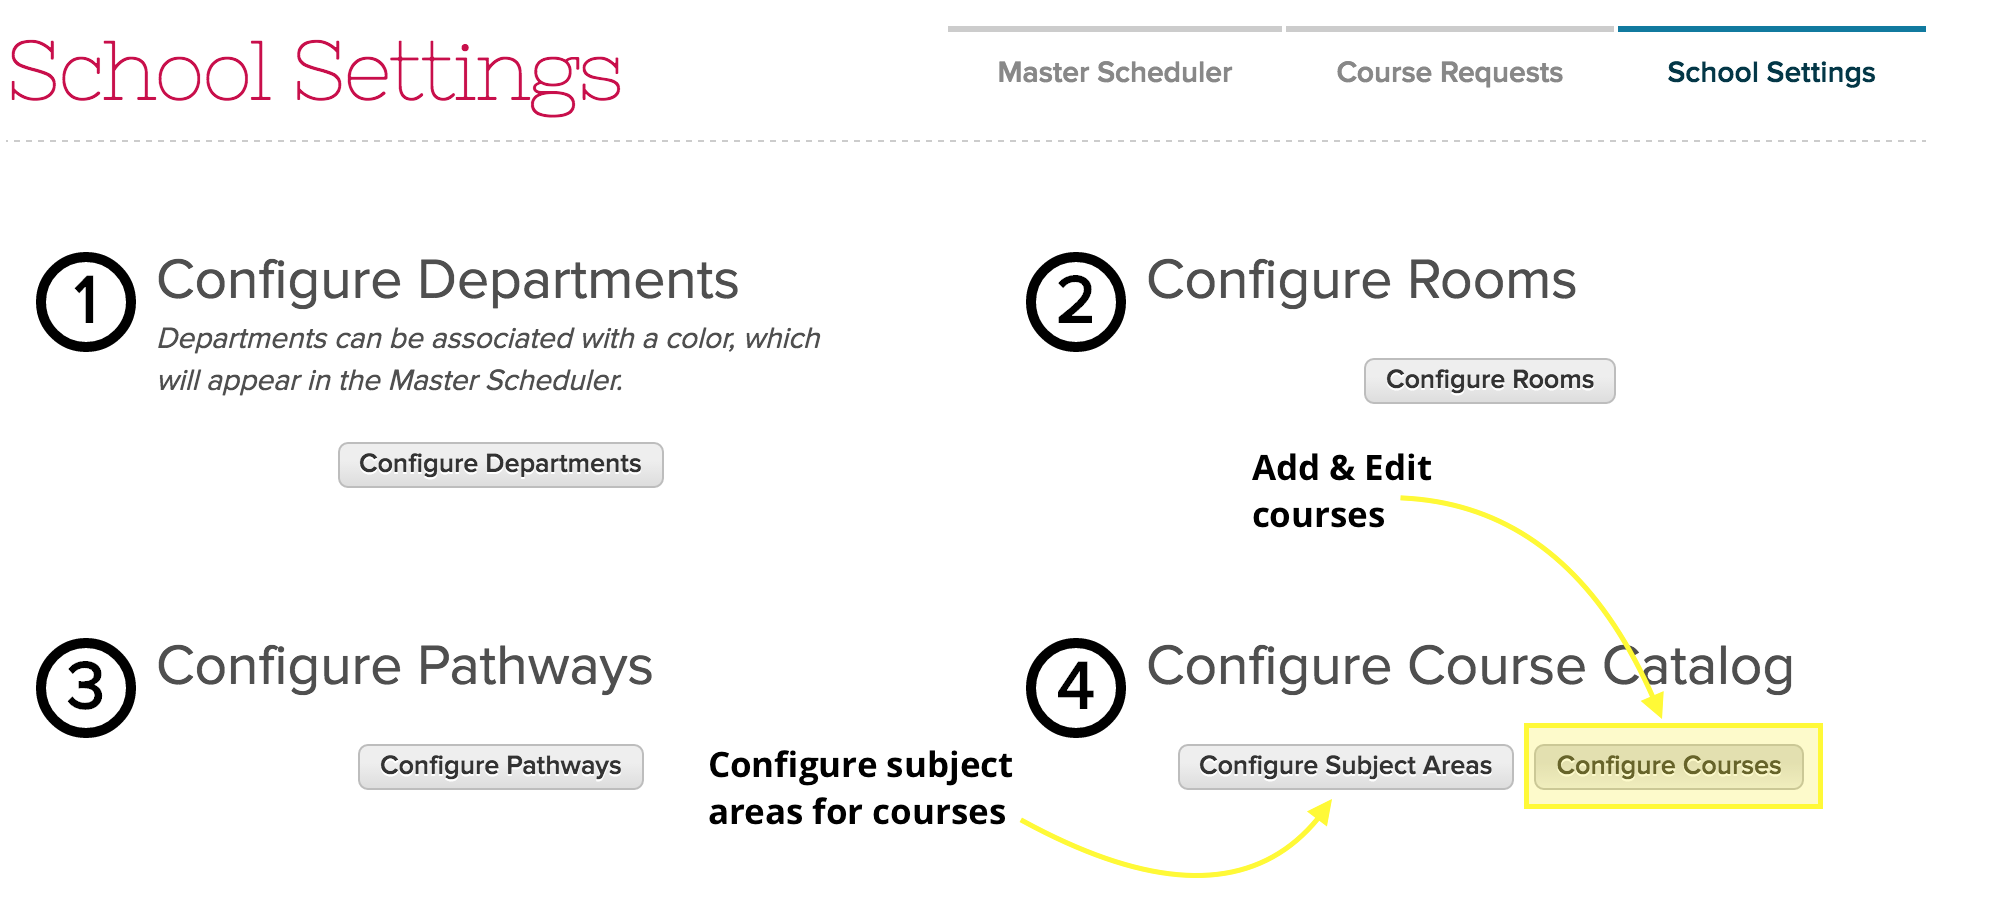
- Click "Add Course"

- Finally, enter information for the course in the dialog box that appears.
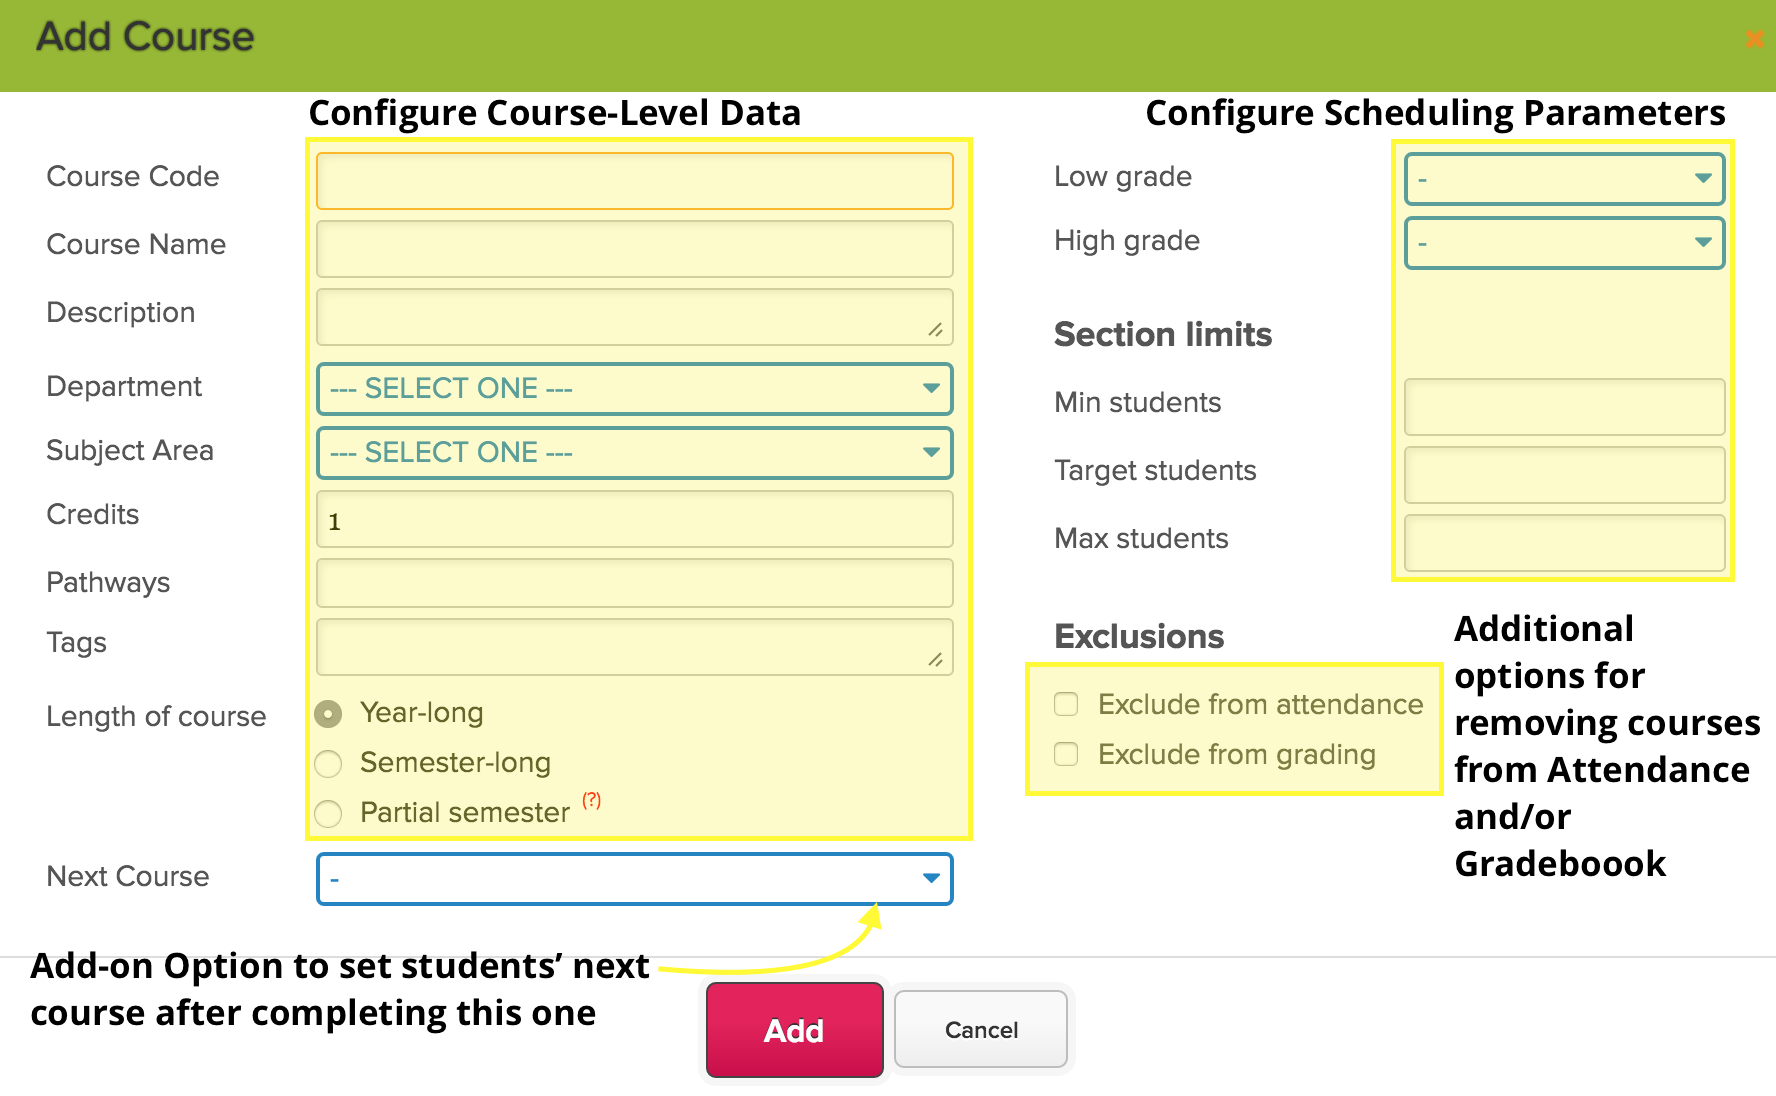
Once courses are created, you can edit their details at any point from the same Courses listing - simply use the search bar to find the courses you need. Click on the listing from the course you need to open up the configuration. Course information also carriers forward from term to term.
Sections
Once courses are setup, you can configure sections for a particular enrollment period in the "Subjects" module. Sections function as the actual classes students are enrolled in for the sake of their attendance, gradebook, and report cards (where as Course information is generally most relevant on Transcripts). Information such as teacher, section code, enrollment period, and scheduling block offered are all configured at the section-level. Here's a look at how to setup or edit sections.
- Go to the Subjects module from the link in your main menu bar

- Use the "Add Section" button in the "Courses & Sections" page (or search for a section to edit using the search bar).

- Fill in your enrollment and scheduling information & Save
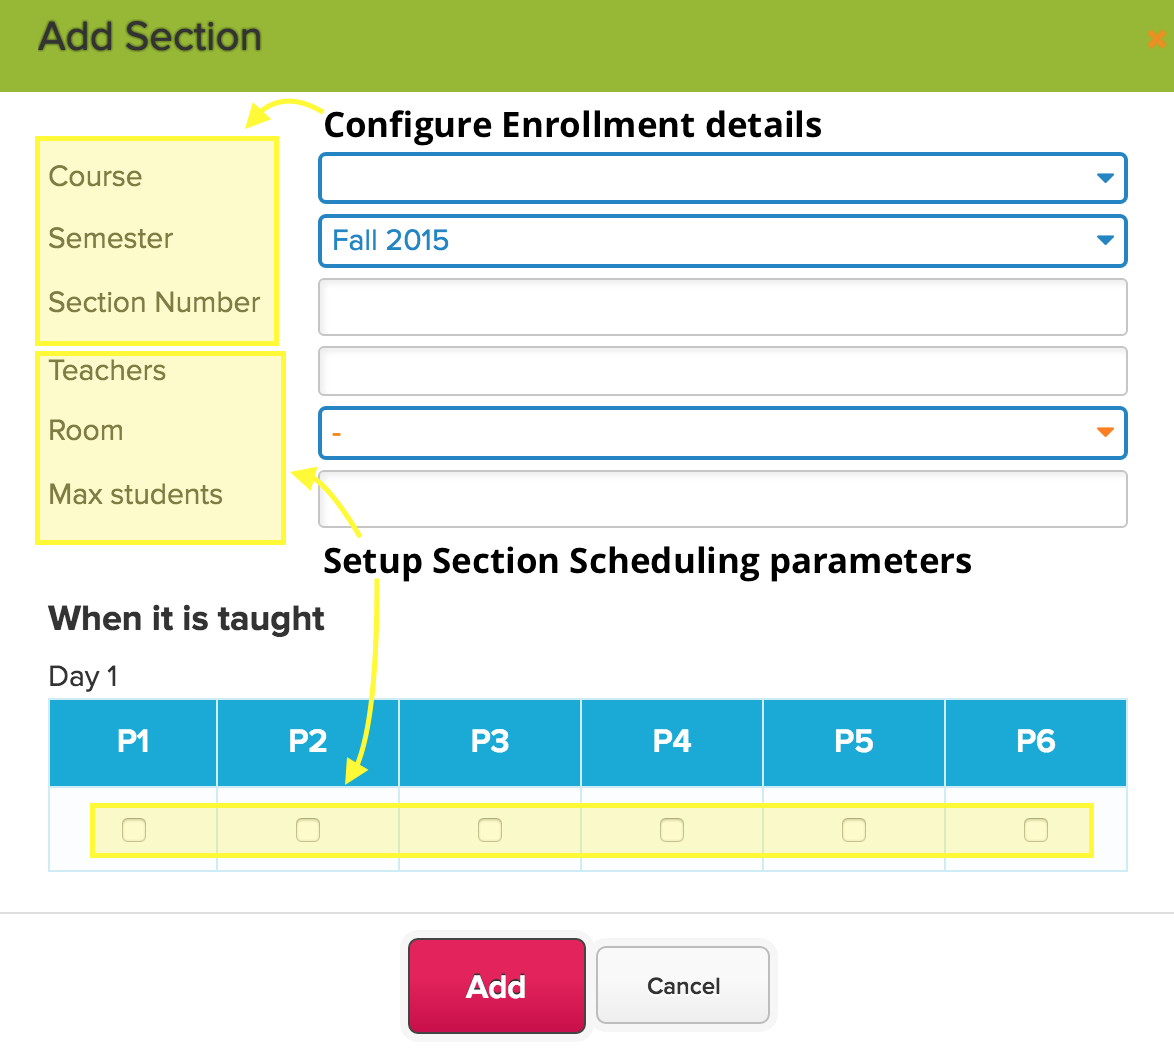
- Use the Enrollment Number link on the main "Courses & Sections" listing to add students and/or view student enrollment history using the History link
Just like course, Sections can be edited at any time before, during, or after a term - though their settings are unique to each term they are offered (i.e. changes made in Semester 1 will not carry through to a corresponding Semester 2 section). In addition, should it be necessary to create a new section for a new teacher then move a large portion (or all) students into it from another section, the Enrollment screen has a bulk-move students option. Students' section enrollment is tracked at a very fine-grain level so it should be possible to reflect all enrollment changes correctly - though do feel free to contact us if you have questions
We hope this helps illuminate the details of the two-leveled scheduling and section enrollment system - and please do reach out to support if you'd like to discuss further.