Schoology is a Learning Management System (LMS), which is technically different from a Student Information System (SIS) like QuickSchools. The differences between these 2 types of systems are discussed in a separate article here. Suffice to say, these systems often work in tandem to provide a complete system for schools.
In this article, we discuss how to connect your QuickSchools account with your Schoology account, in order to facilitate transfer / synchronization of data between the 2 systems, such that each system is able to fulfill its purpose as either an LMS or SIS.
Overall Process
- General Overview
- Connecting to Schoology
- STEP 1: Synchronizing Students
- STEP 2: Synchronizing Teachers
- STEP 3: Synchronizing Grading Periods (i.e. Academic Terms / Semesters)
- STEP 4: Map Grades (i.e. Grade Levels)
- STEP 5: Synchronizing Subjects
- STEP 6: Synchronizing Grading Categories (i.e. Gradebook Categories)
- STEP 7: Synchronizing Grades
General Overview
Pre-Requisites
In order to integrate from QuickSchools to Schoology, you will need a paid Enterprise-version of Schoology. Since QuickSchools is an SIS for schools, then the Schoology LMS must also be for schools. The integration will not work with the free Teacher-version of Schoology.
Typical Flow
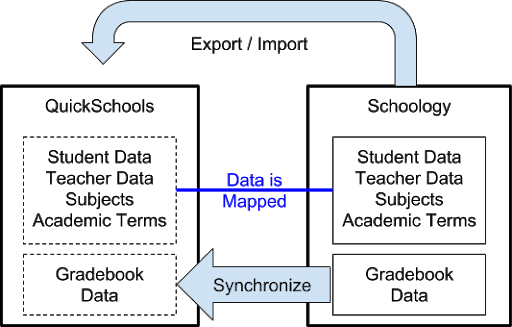
We usually regard the SIS as the source for all information related to students, which you can then export to Schoology. This means that in the most common case, you will have student data in QuickSchools, but not in Schoology, after which you can simply export all data to Schoology:

But if you already have information stored in Schoology, you can then map information from Schoology to QuickSchools.
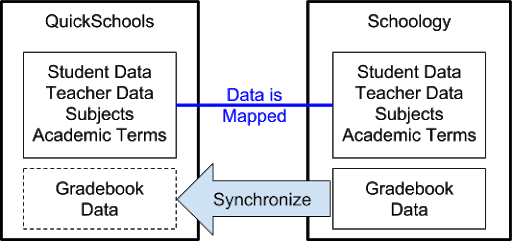
If for some reason you only have information in Schoology, but not in QuickSchools, you will need to import your roster information to QuickSchools first, before you can map the data in QuickSchools with the data in Schoology via our App.
Connecting to Schoology
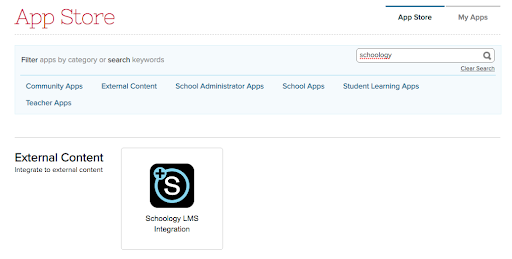
Install the App
From your QuickSchools account, go to the “App Store”, find the “Schoology” App:
After clicking on the app, click on the “Install App” button:
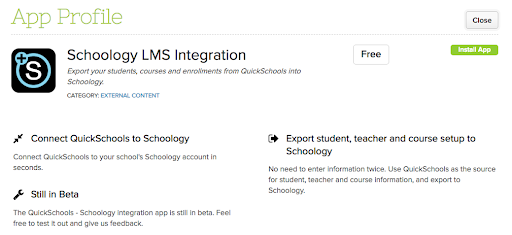
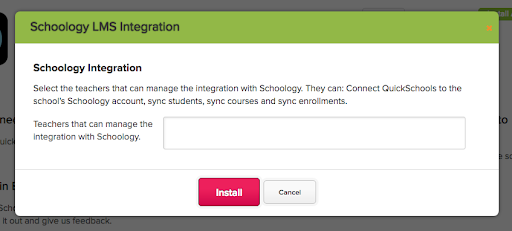
Finally, be sure to configure who should get access to setting up the configuration for integration, before clicking on “Install”:
Connecting to Schoology
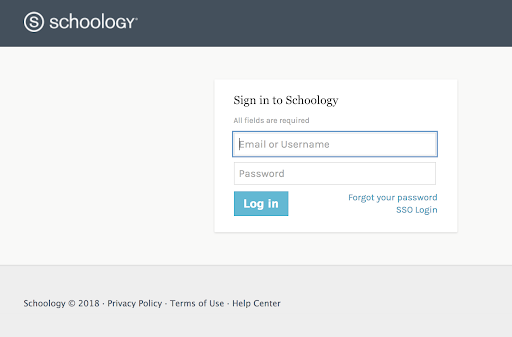
Once the app is installed, go to the “Schoology” app, and click on the “Connect to Schoology” button:

You will be redirected to Schoology to sign in:
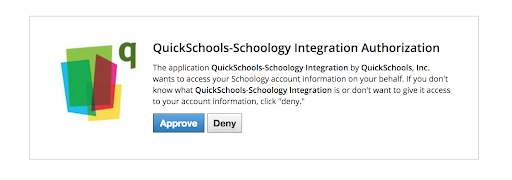
After signing in, you will be prompted to Authorize the Integration. Click on the “Approve” button:
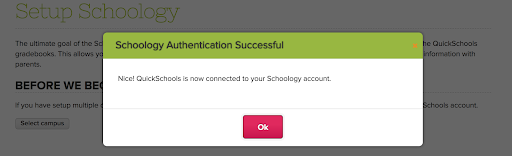
After completing this step, you’ll get a pop-up saying that authentication was successful:
The Schoology app screen will then reload and display a bunch of options for mapping/exporting data from QuickSchools to Schoology:
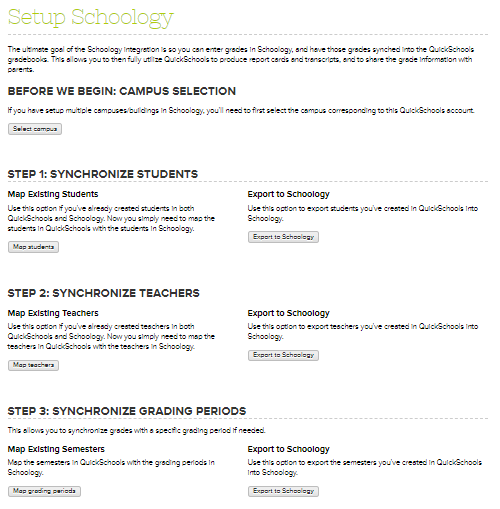

STEP 1: Synchronizing Students
The first step in the process is to synchronization will be for students. Depending on whether your original data resides in QuickSchools or in Schoology will depend on whether you want to simply map students, or export students. Steps for mapping and exporting are virtually the same for other elements like Teachers, Academic Terms, and Subjects.
Mapping Students
When clicking “Map Students” you’ll be greeted with the following screen:
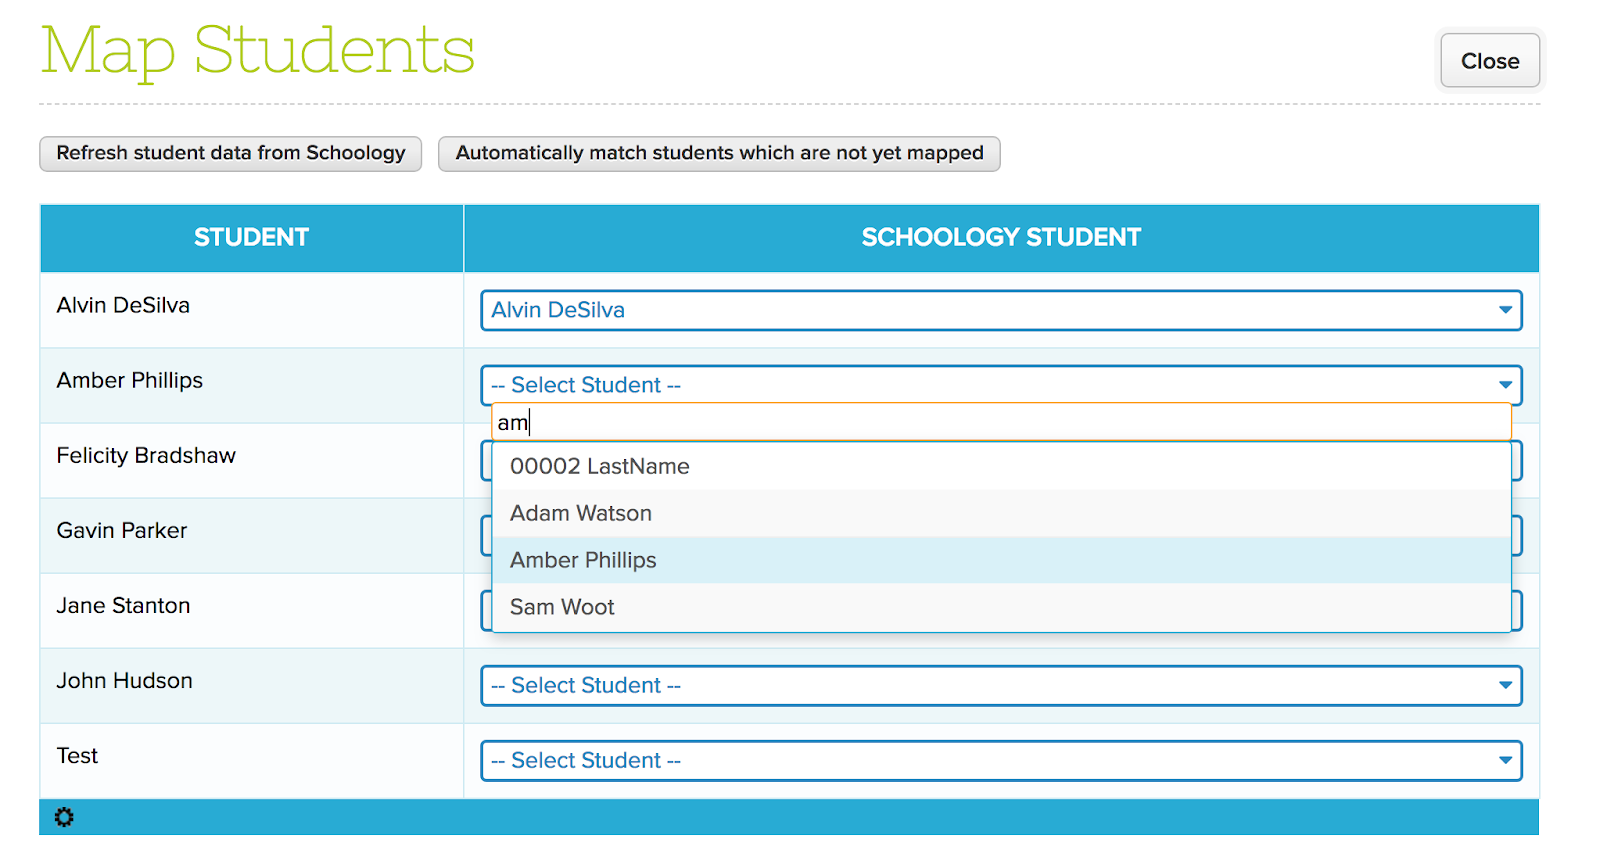
Simply match students from the dropdown, or use the button labelled “Automatically match students which are not yet mapped” to have the system do it for you:

The system tries to match students based on name. You can approve all students by clicking on “Approve All Recommendations”.
Exporting Students
If you click on the “Export to Schoology” button under the “Step 1: Synchronizing Students” section, you’ll see all unmapped students that can be exported:
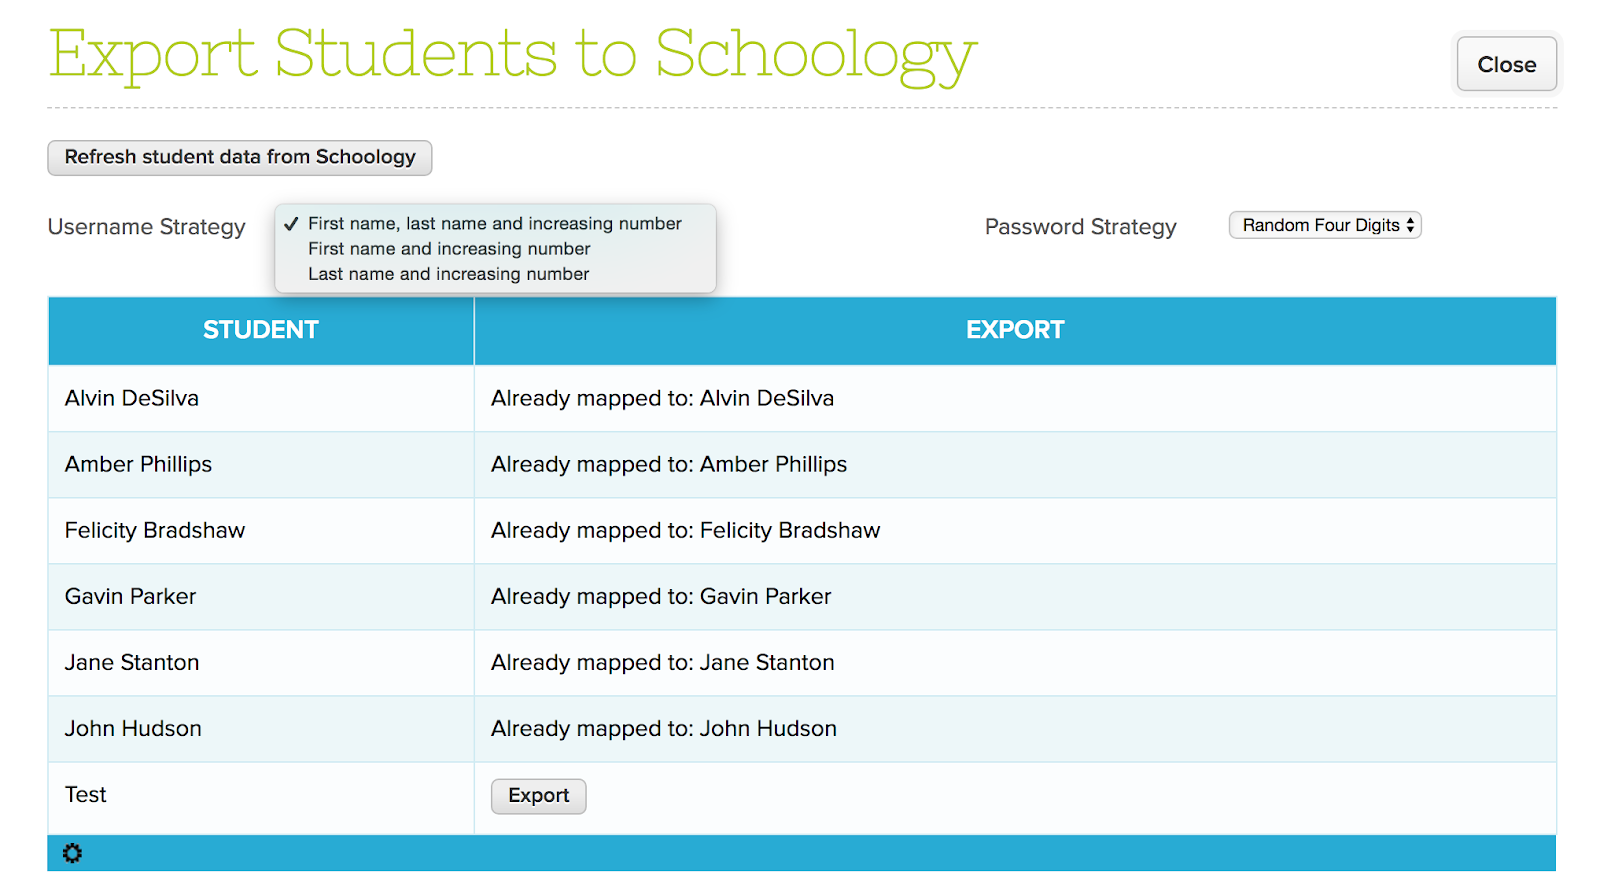
Simply click on the “Export” button to export the student record to Schoology. Please note that exporting a student will also create a user account for the student. Please select the appropriate “Username Strategy” and “Password Strategy”. You can always change the username and password in Schoology if needed.
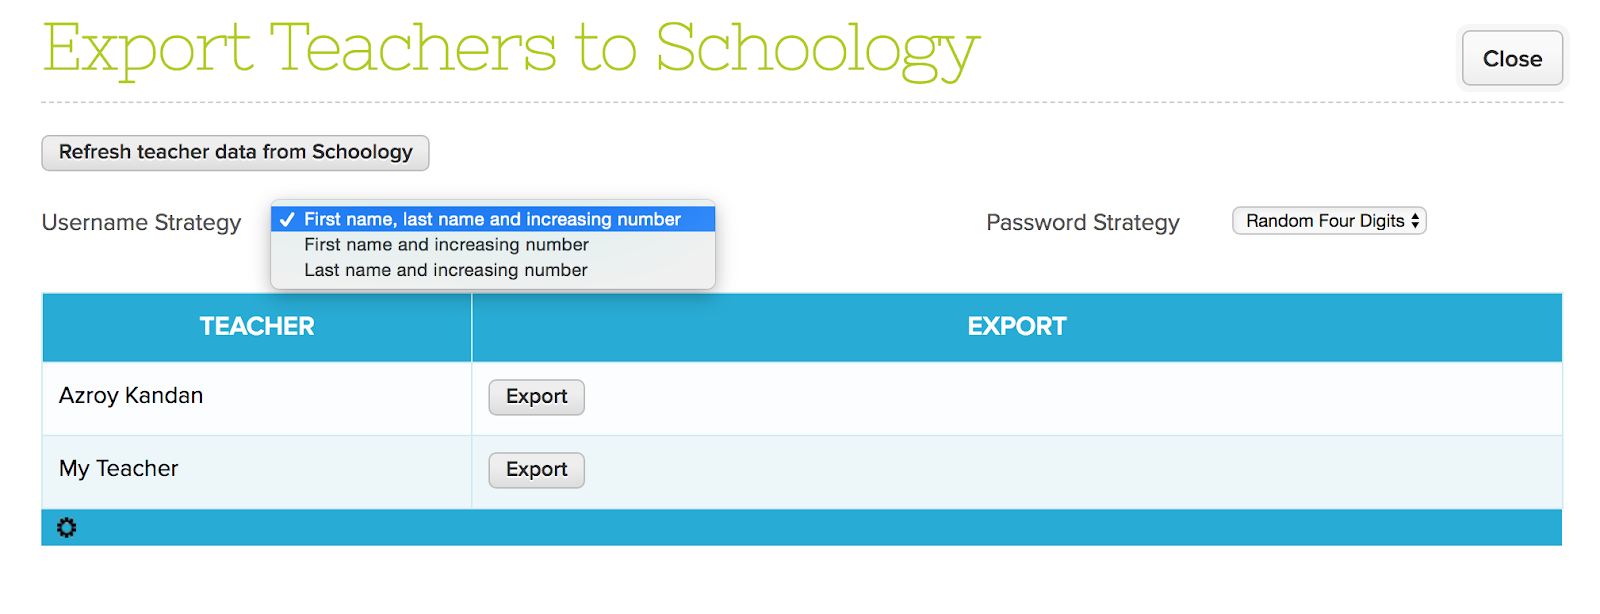
STEP 2: Synchronizing Teachers
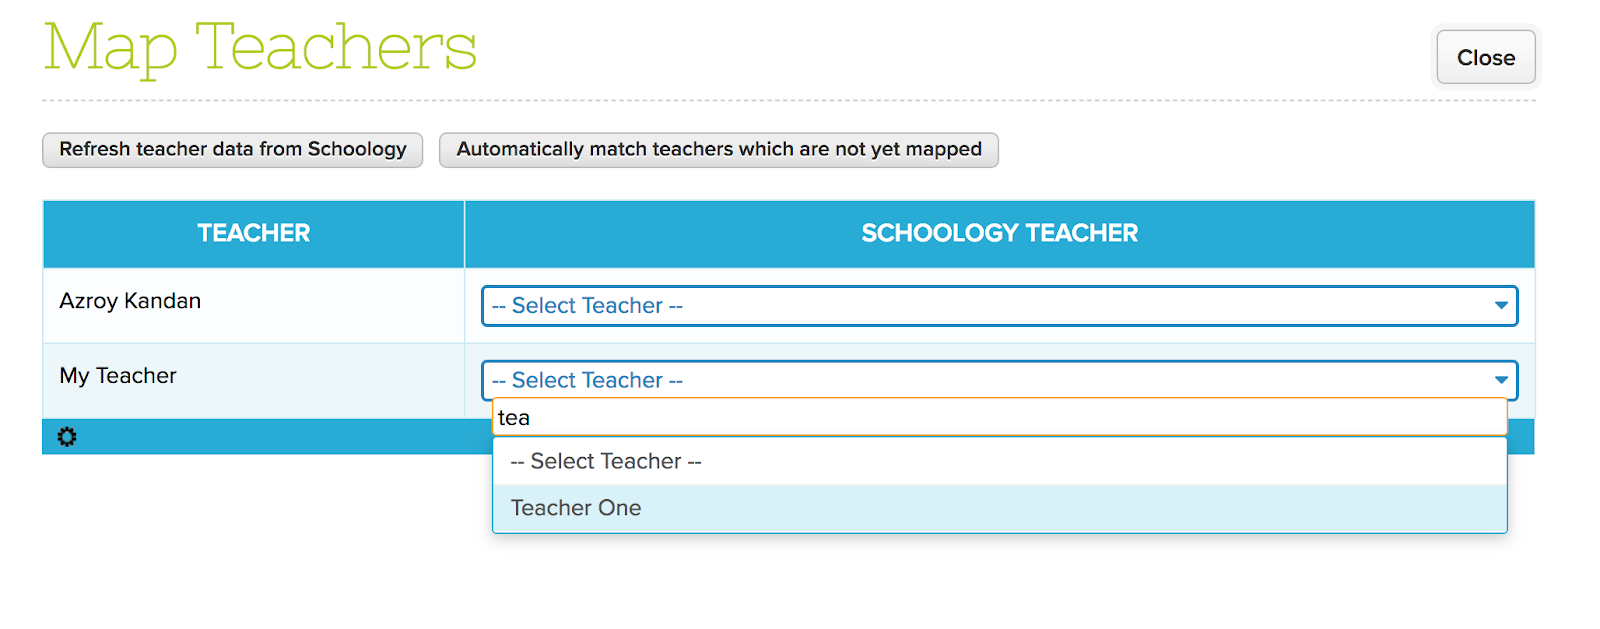
Mapping Teachers
The process for mapping teachers is pretty much the same as with students:
Exporting Teachers
Likewise, the process for exporting teachers is similar to the process for exporting students
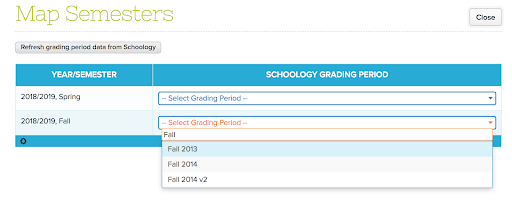
STEP 3: Synchronizing Grading Periods (i.e. Academic Terms / Semesters)
Mapping Grading Periods
In this section, you will be mapping the academic terms in QuickSchools with Grading Periods in Schoology:
Exporting Grading Periods
Similar to Students and Teachers, you can also export your Academic Terms in QuickSchools into Grading Periods in Schoology:
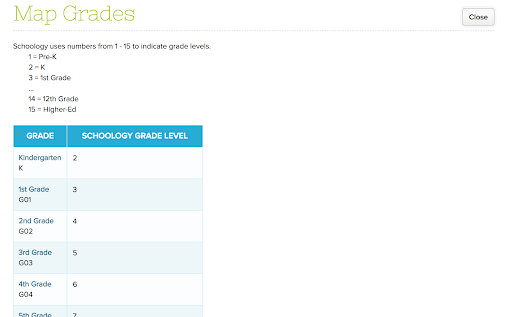
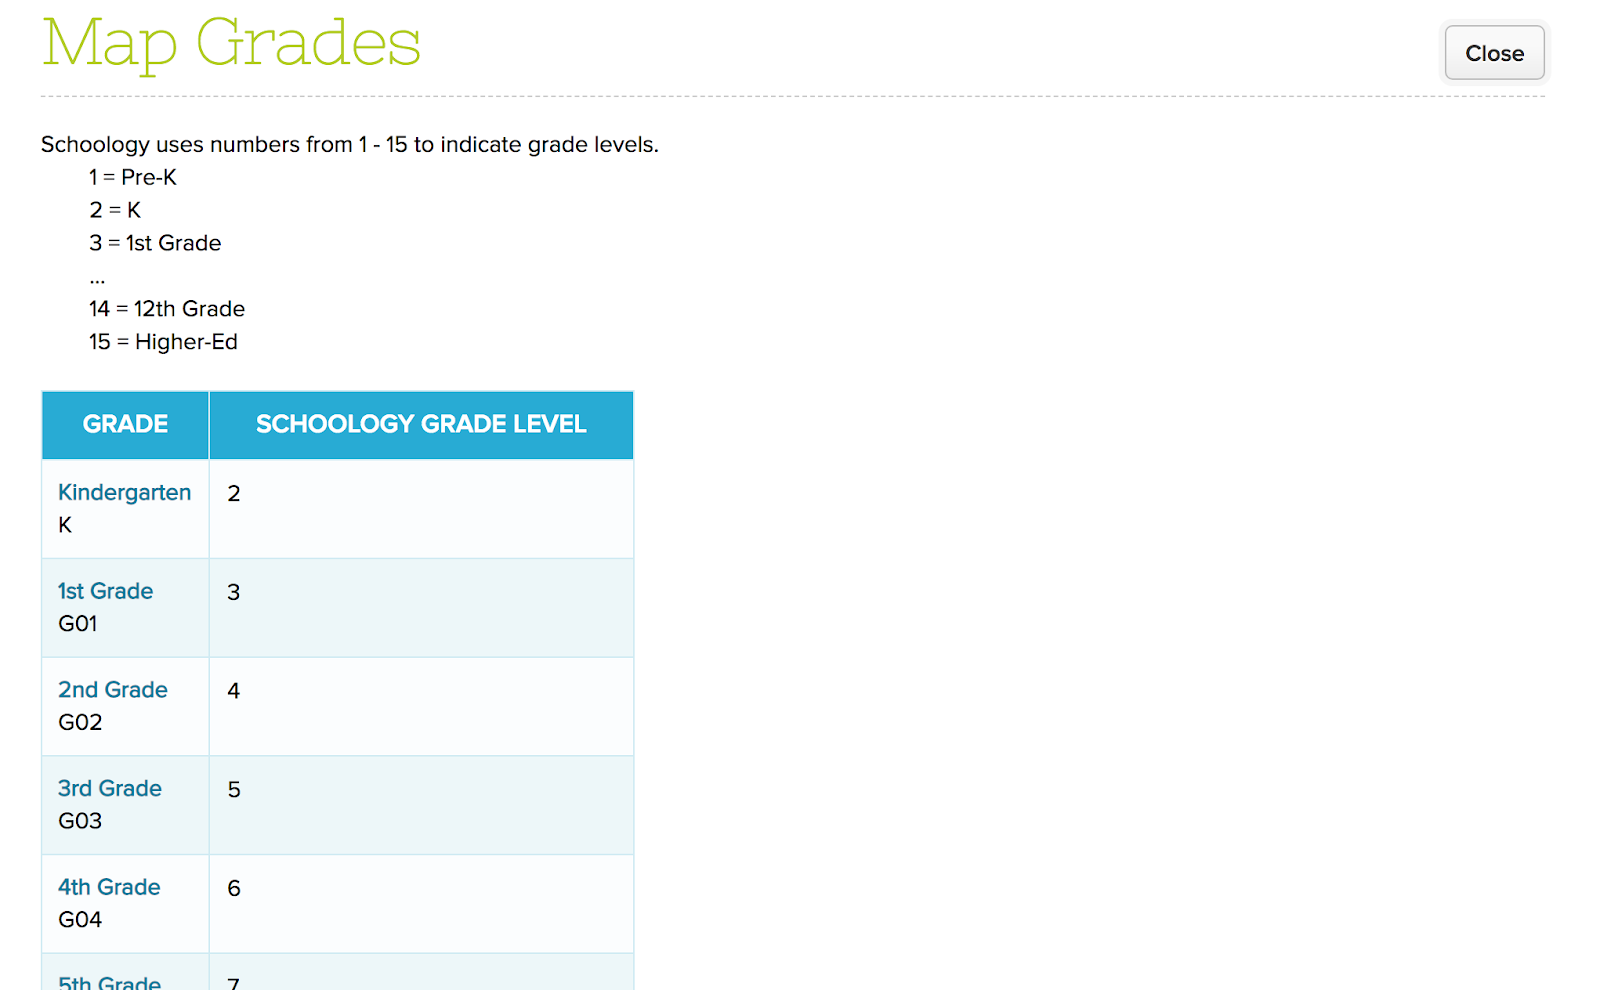
STEP 4: Map Grades (i.e. Grade Levels)
This is where you can map Grade Levels in QuickSchools with Grades in Schoology. For the most part, this should just remain as-is:
STEP 5: Synchronizing Subjects
So the last step before you can begin synchronizing grades from the gradebook, is to map/export the subjects.
Mapping Subjects
As you might have guessed, mapping subjects is the same as mapping teachers, students or academic terms:
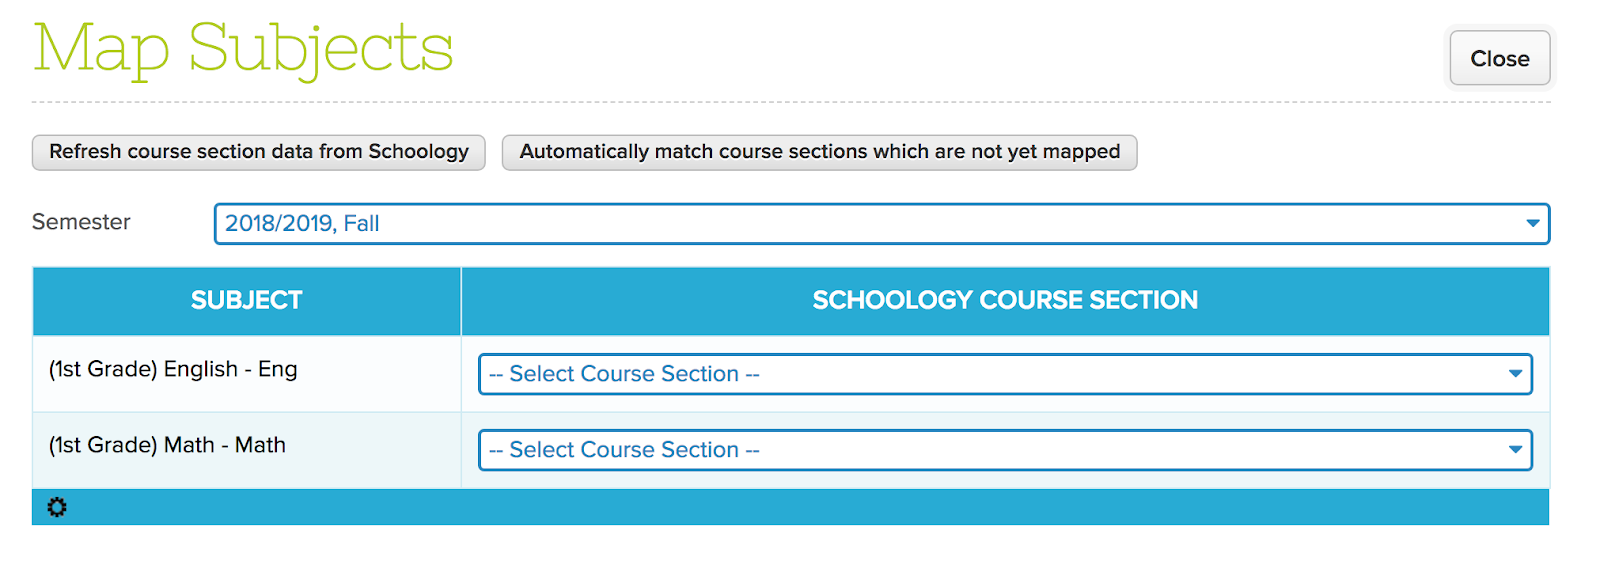
The only thing to note here is that even though subjects are mapped, you still have to use the Export function (discussed below) to synchronize the students enrolled in each subject.
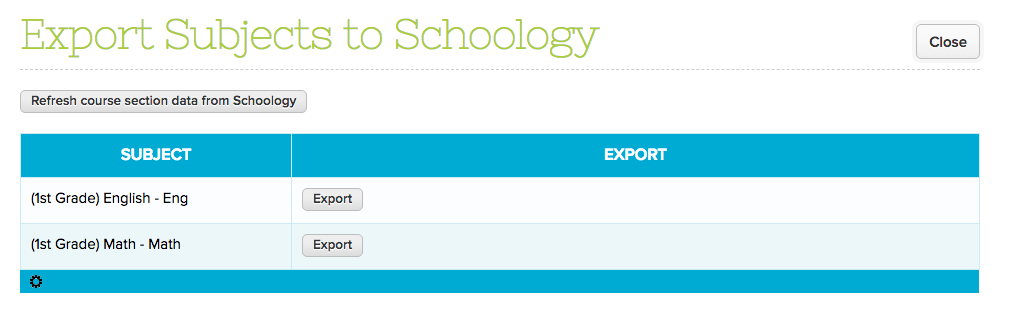
Exporting Subjects and/or Subject Enrollments
The export subject function actually does two things. If the subject is not yet mapped, the subject will be exported into Schoology. And then, the students enrolled into the subjects are also synchronized:
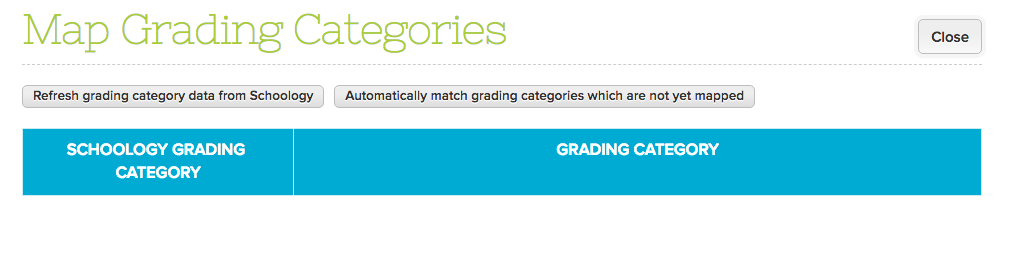
STEP 6: Synchronizing Grading Categories (i.e. Gradebook Categories)
This is an optional step for mapping Gradebook Categories if your QuickSchools Gradebooks with Grading Categories in Schoology:
STEP 7: Synchronizing Grades
So once you’ve completed all the steps above, you’re ready to run the final step of actually synchronizing the Gradebook from Schoology with the Gradebook in QuickSchools. Once synchronized, you can generate report cards and transcripts from your Gradebook Data.
Scheduling a Synchronization run
Synchronization works by scheduling a run. You can have the synchronization run ONCE, or daily. Click on “Schedule Synchronization” to begin the process:
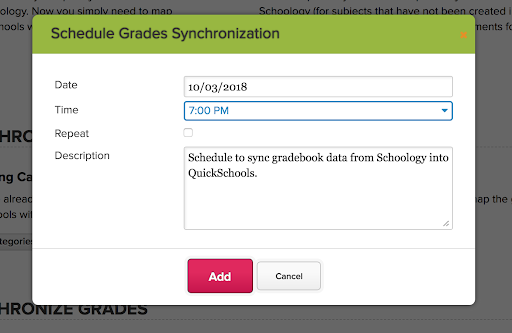
As you can see, there is a “Repeat” checkbox, that will allow you to specify running the task daily. Once saved, you can view Pending runs by clicking on the “Synchronization history” link.
Reviewing Pending and Completed runs
The “Synchronization history” link will show both Pending and Completed synchronizations:
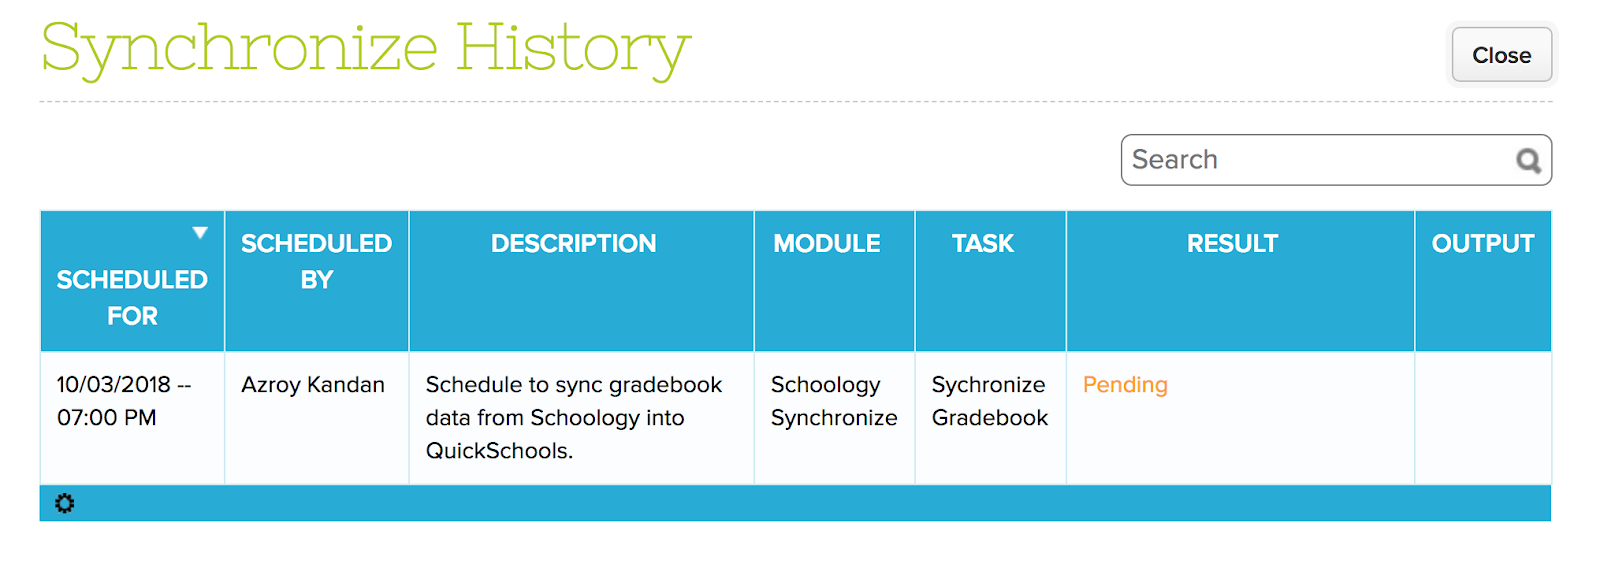
If you click on a “Pending” task, you will be able to edit or cancel the run. For completed runs, you can click on the “History” link that appears under the “Output” column”.
18AK1003