After selecting your preferred transcript template and configuring the display, you can then customize how your labels appear and show other information on the transcript. Follow the instructions below:
- Editing Labels
- Adding Custom Fields
- Adding Custom Grading Scale
- Using the Custom School Section
- Using Custom Student Section
- Adding Notes
From the Template Selection page, click the Customize Template link.

This will bring up the Customize Transcript Template page.

Editing labels
To edit the student information labels and headers, just click on the texts and edit as needed. The labels can be configured from the switches on the Template Selection page and may vary depending on the template used. Click the Save or Save & Close button afterward.

Adding Custom Fields
If enabled, up to 3 custom labels are available on each templates and each label can be manually edited. You can find this configuration under the Header Information switches from the Template Selection page.

To edit the labels, just follow the same instructions as above.
Note: Showing custom fields or parent information from student profiles is not yet supported. The fields must be manually added on the template and the values entered on each student's transcript.
Custom Grading Scale
If enabled, you can add an additional grading scale or hide the default grading scale. The custom grading scale contains only 1 row with 5 columns.

Grading scales created under the Grading Setup tab that are not set as default should be manually typed in.
 Sample custom grading scale with values
Using the Custom School Section
Use the Custom School Section to show Graduation Requirements and other school-related information. To enable this, tick the checkbox "Show School Section 1" from the Template Selection tab then select how many columns to show. If you need another table, enable the School Section 2 as well.

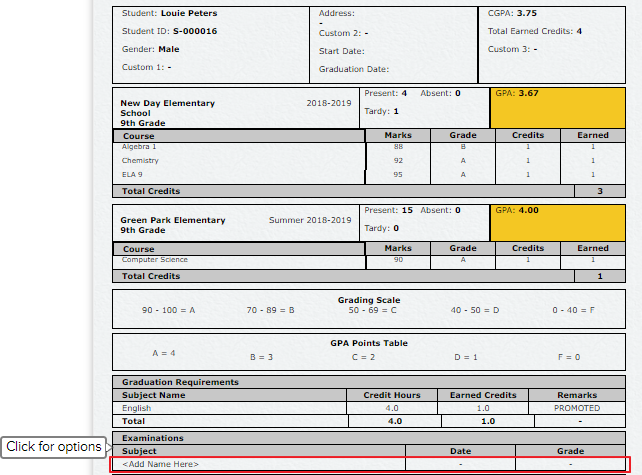
Go back to the Customize Template page and hover your mouse on the 2nd row, 1st column box until the Click for options bubble appears. Click on the box and wait for the Add New Item option to appear. Click once more and a row will appear after the header table. Edit the labels and tables then Save.

Values can be left blank and can be filled out from the student’s transcript page.


Note: Please be careful when revising the school section labels later on as this resets/removes the values on the student’s transcripts.
Using the Custom Student Section
For the Student section, the headers can be updated via Customize Transcript Template page but the rows should be added through the student’s transcript.
Adding Notes
Generic notes for all students can also be added from the Customize Template page as well as directly from the student’s transcript. This section can be used for accreditation notes. At the same time, you can use this section to manually the Grading scales if you want to hide that section above to maximize the space for semesters and grades only.

For more information on setting up your transcripts, check out our Transcripts - Admin Guide article.
If our public templates do not meet your requirements, we can customize the design and function for you with additional fee. Listed below are some of the customization that we support, but are not limited to:
- Removal of a specific subject from GPA computation
- Removal of a specific subject from Credits
- Cumulative GPA per grade level or academic term/semester (for semester-based)
- Converting of attendance values to percentage
For pricing, feel free to email us your requirements at support@quickschools.com.
19MR0227