QuickSchools provides integration with different Learning Management System (LMS). This eases the process of managing and transferring the grades from the LMS to your QuickSchools account.
This article will help you connect your QuickSchools account with Google Classroom, allowing you to synchronize the data between the QuickSchools Gradebook and Google Classroom.
Connection Setup
Go to https://console.developers.google.com.
Confirm you are logged in under the main Google Classroom account.
Create Project
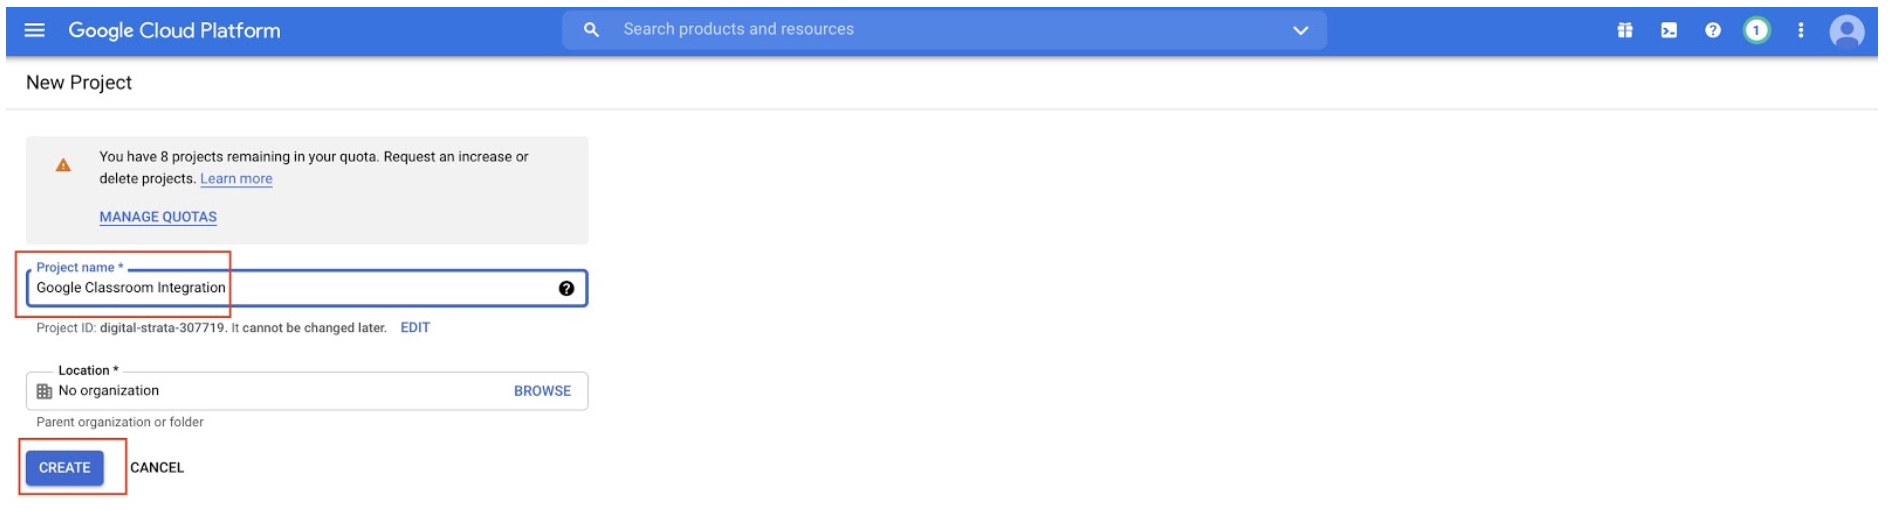
Click on “Select a project” and then click ”CREATE PROJECT” on the top right:

Give the project a name like “Google Classroom Integration” and click “CREATE”.
Enable Google Classroom Library
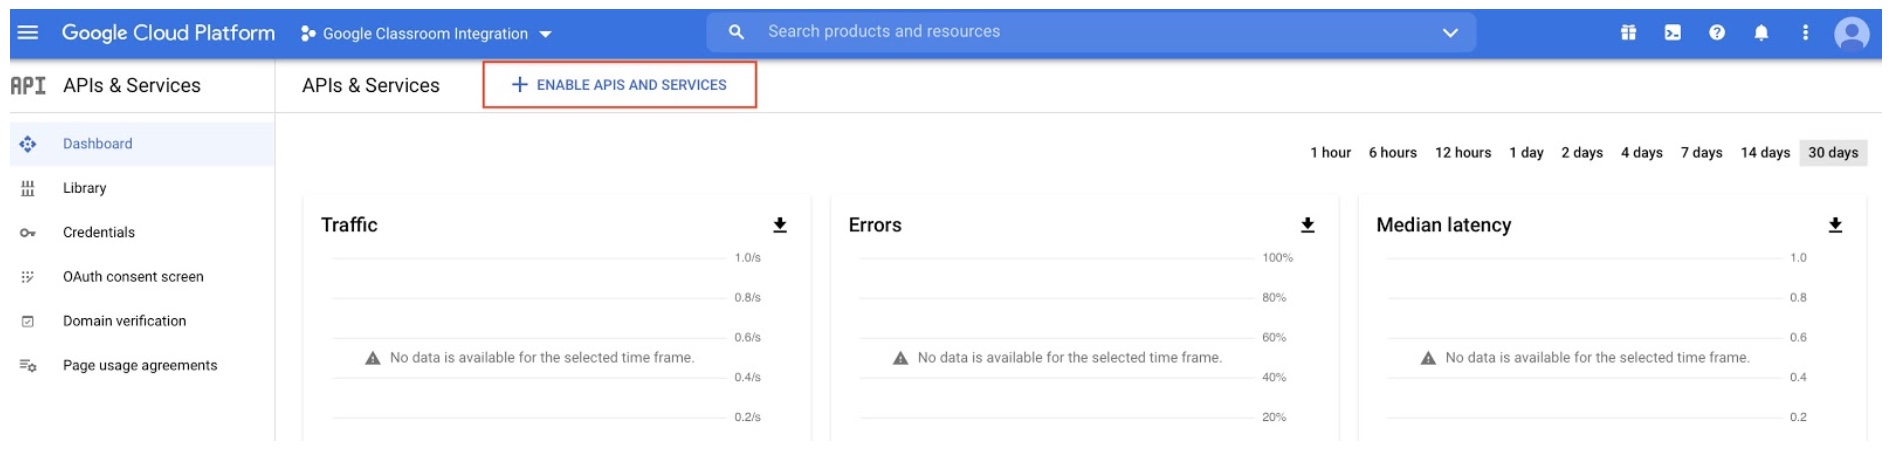
Click on “Enable APIs and Services”:
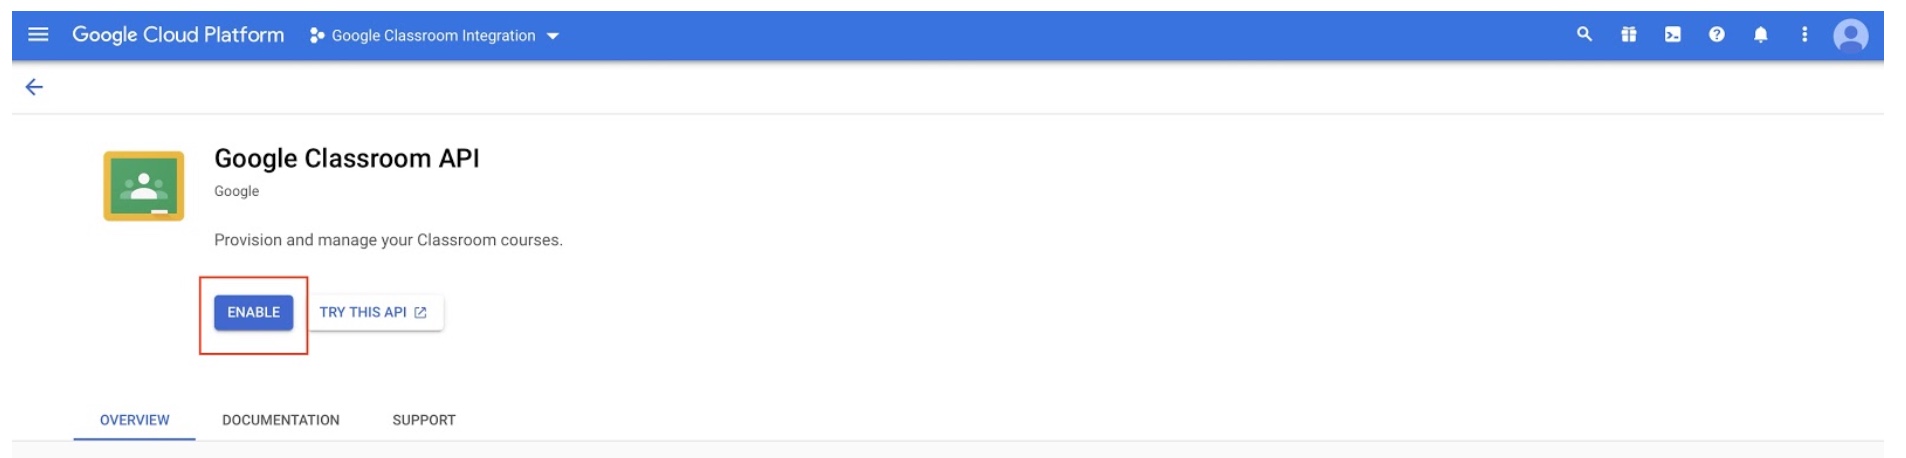
Search for “Classroom” to find the “Google Classroom API” library:

Click on the “Google Classroom API” library, and then click on “ENABLE”:
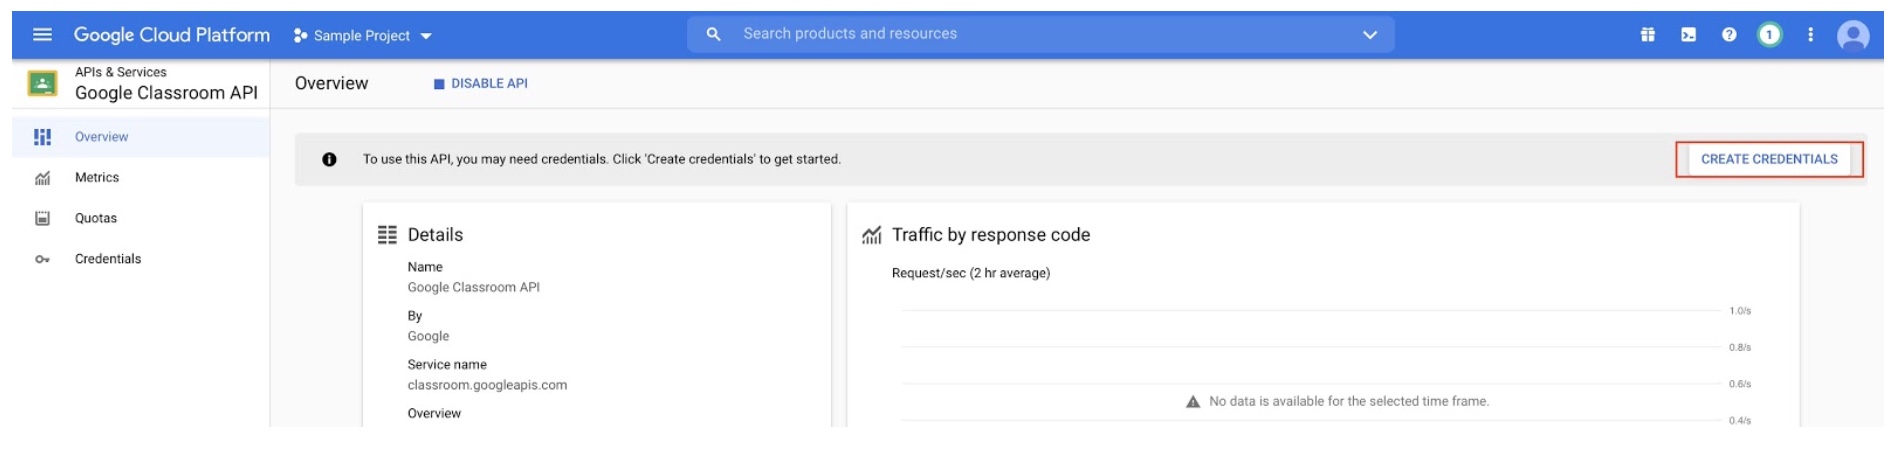
On the following page, click on “Create Credentials”, to return to the main “APIs & Services” page:
Create API Key
PART I
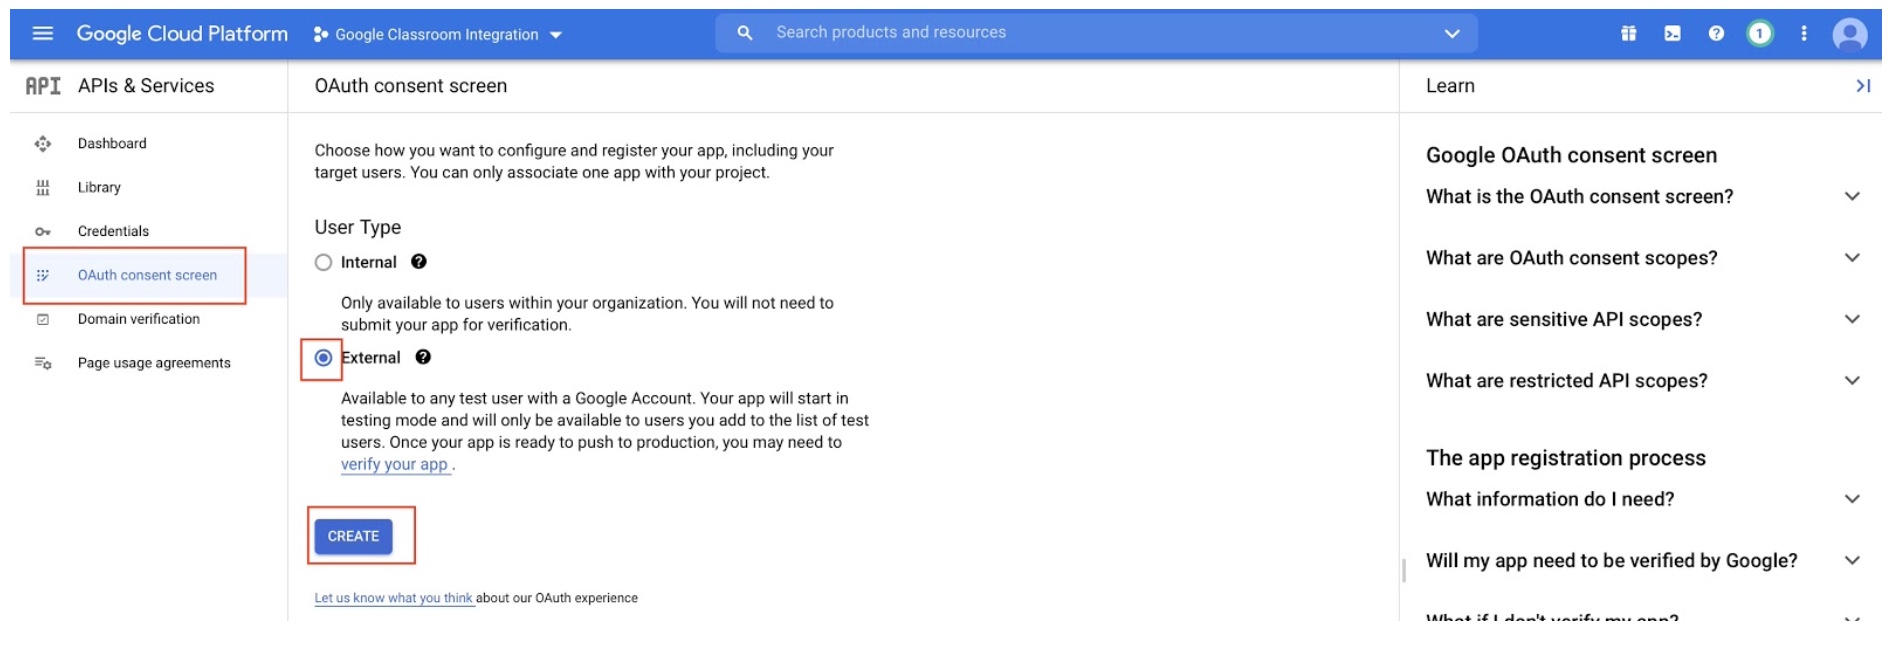
Click on the “OAuth consent screen” on the left side of the page, select “External” and click “CREATE”:
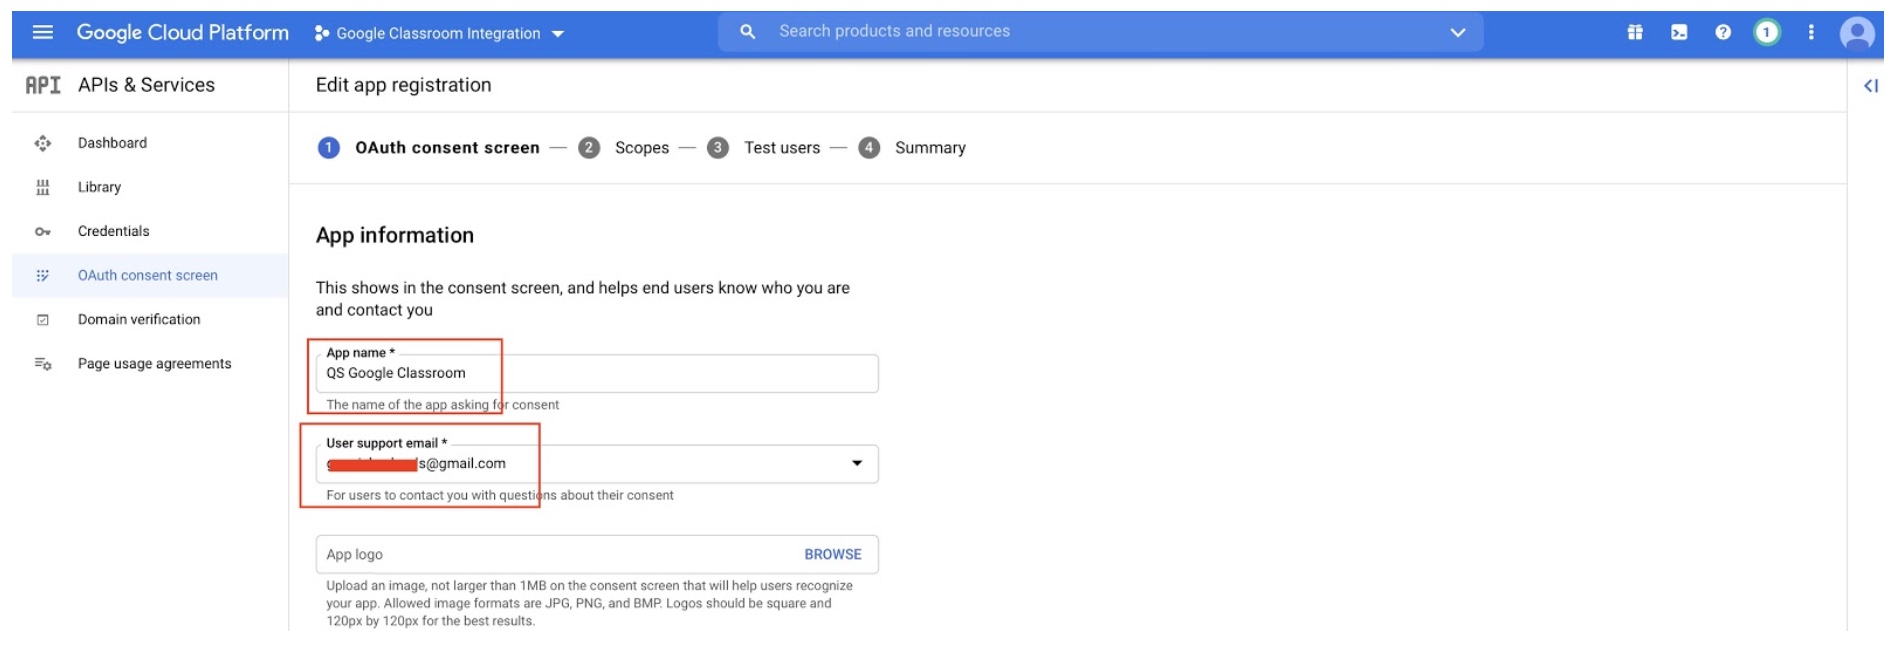
Under “App Information”, enter “QS Google Classroom” as the App Name and select your Google Classroom email address:
Scroll down to the “Authorized Domains'' section, and add “quickschools.com”. Add your Google Classroom email address under “Developer contact information”:
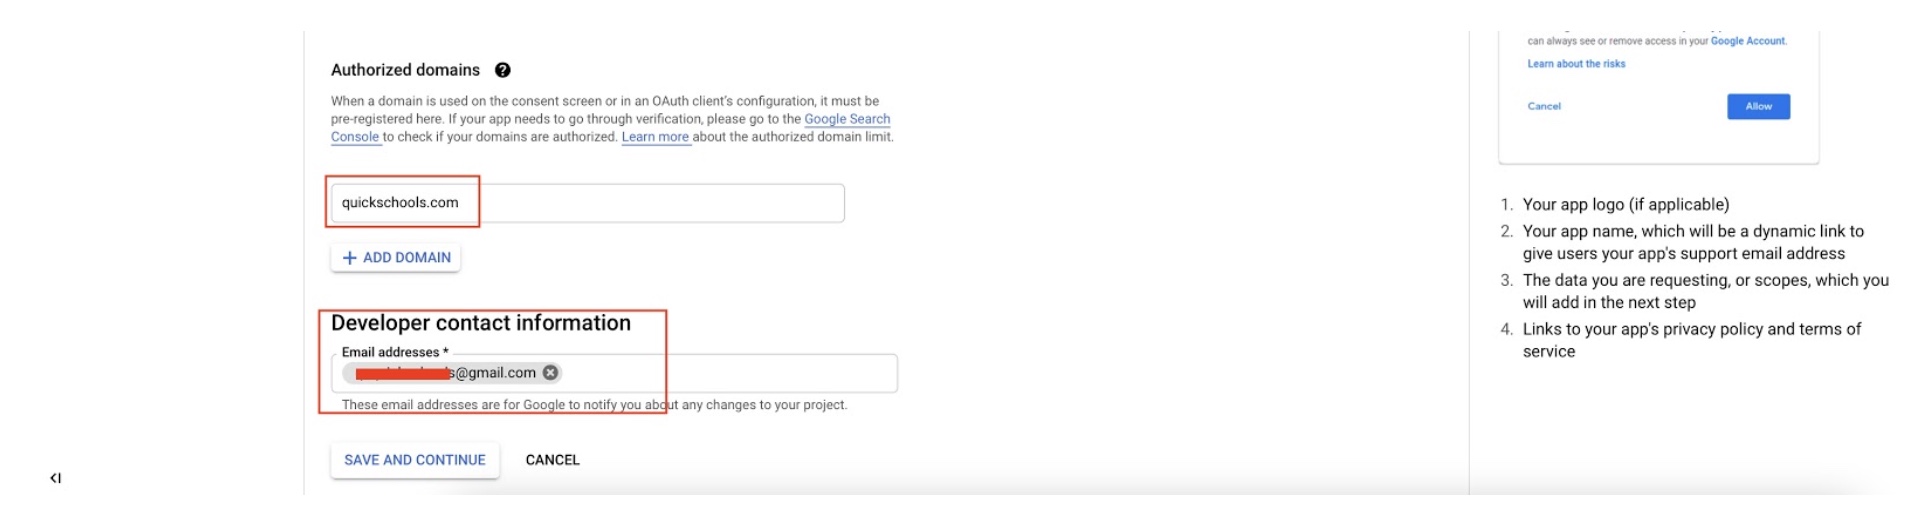
Click “SAVE AND CONTINUE” for each sequential step until the “Summary” page is displayed.
PART II
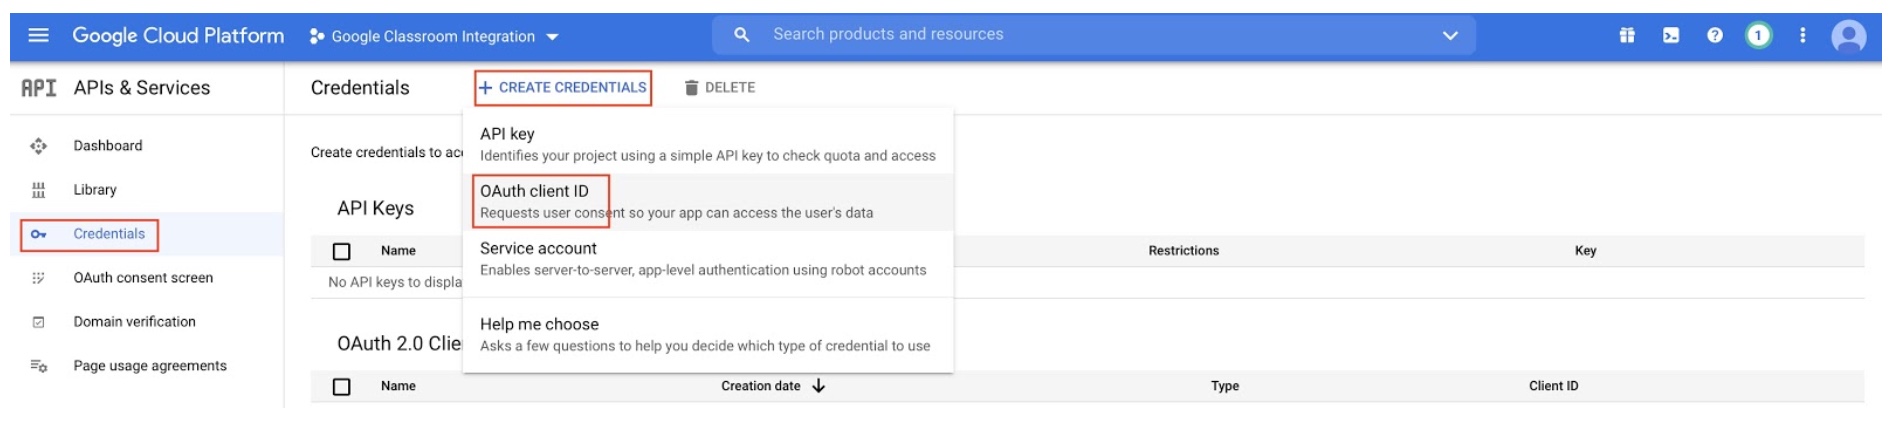
Click on “Credentials” in the left side of the page, then click on “CREATE CREDENTIALS” and “OAuth Client ID”:
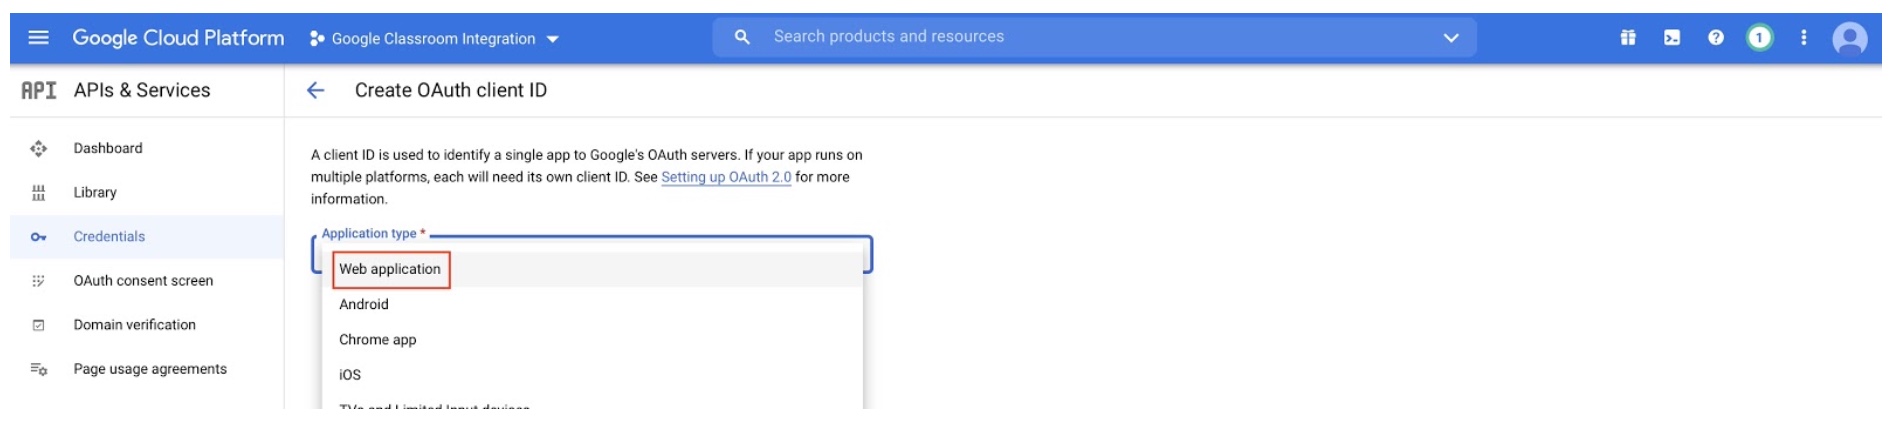
 Under “Application Type”, select Web Application:
Scroll down to the “Authorized redirect URIs” section, and click on “Add URI”. Add the following entries and replace “<SCHOOLCODE>” with the unique school code for your QuickSchools account. Please take note as there are two “<SCHOOLCODE>” sections under each URL:

-
http://<SCHOOLCODE>.quickschools.com/sms/googleOAuth2/googleOAuth2_success.jsp?subdomain=<SCHOOLCODE>&app=GoogleClassroom -
https://<SCHOOLCODE>.quickschools.com/sms/googleOAuth2/googleOAuth2_success.jsp?subdomain=<SCHOOLCODE>&app=GoogleClassroom
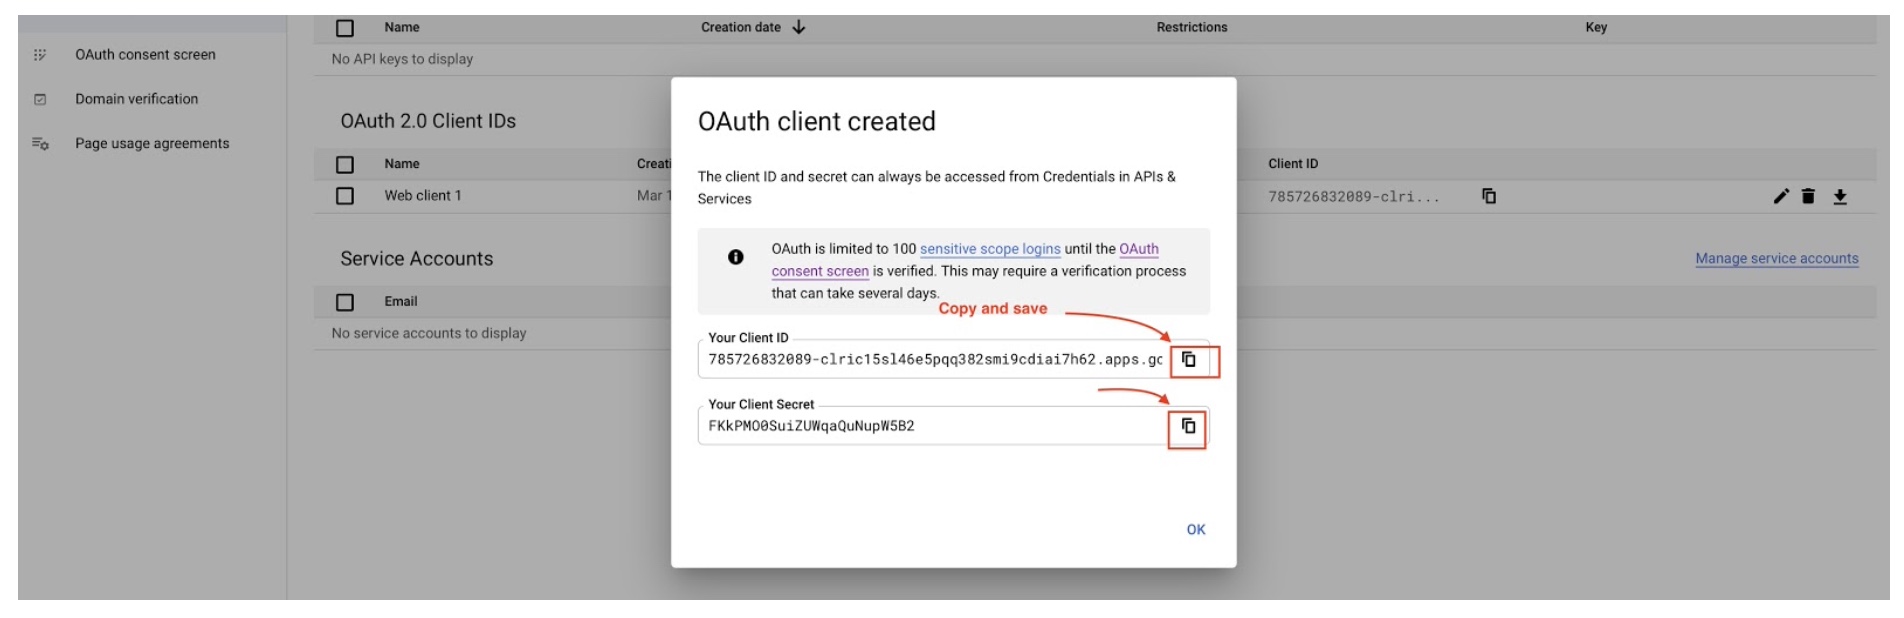
Click Create once the two URLs are added, and copy the “Your Client ID” and “Your Client Secret” separately:
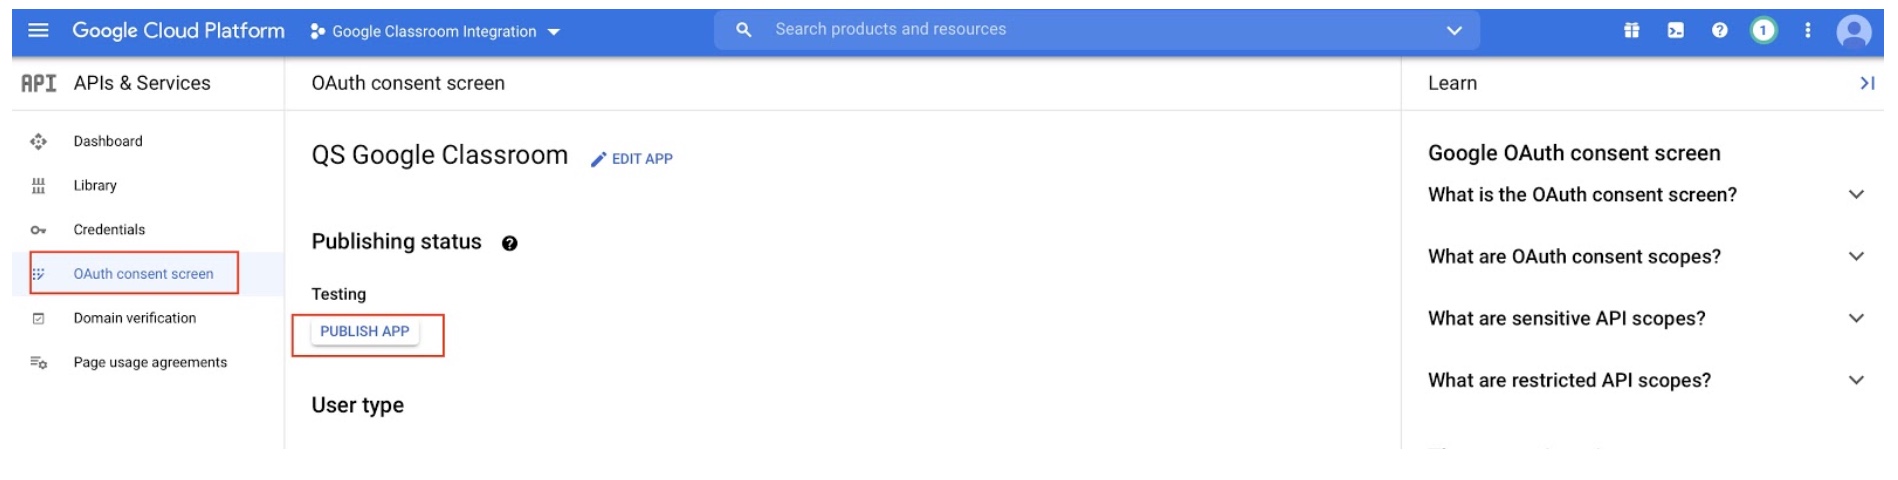
Click on the “OAuth consent screen” on the left side of the page, click on “Publish App”, and click “Confirm” on the popup:
Configure Quickschools
In your Quickschools account, open the Google Classroom module and scroll down to the “CONFIGURATION”. In the “Google Classroom Client ID” field, enter the “Your Client ID” copied earlier. In the “Google Classroom Client Secret Key” field, enter the “Your Client Secret” key.
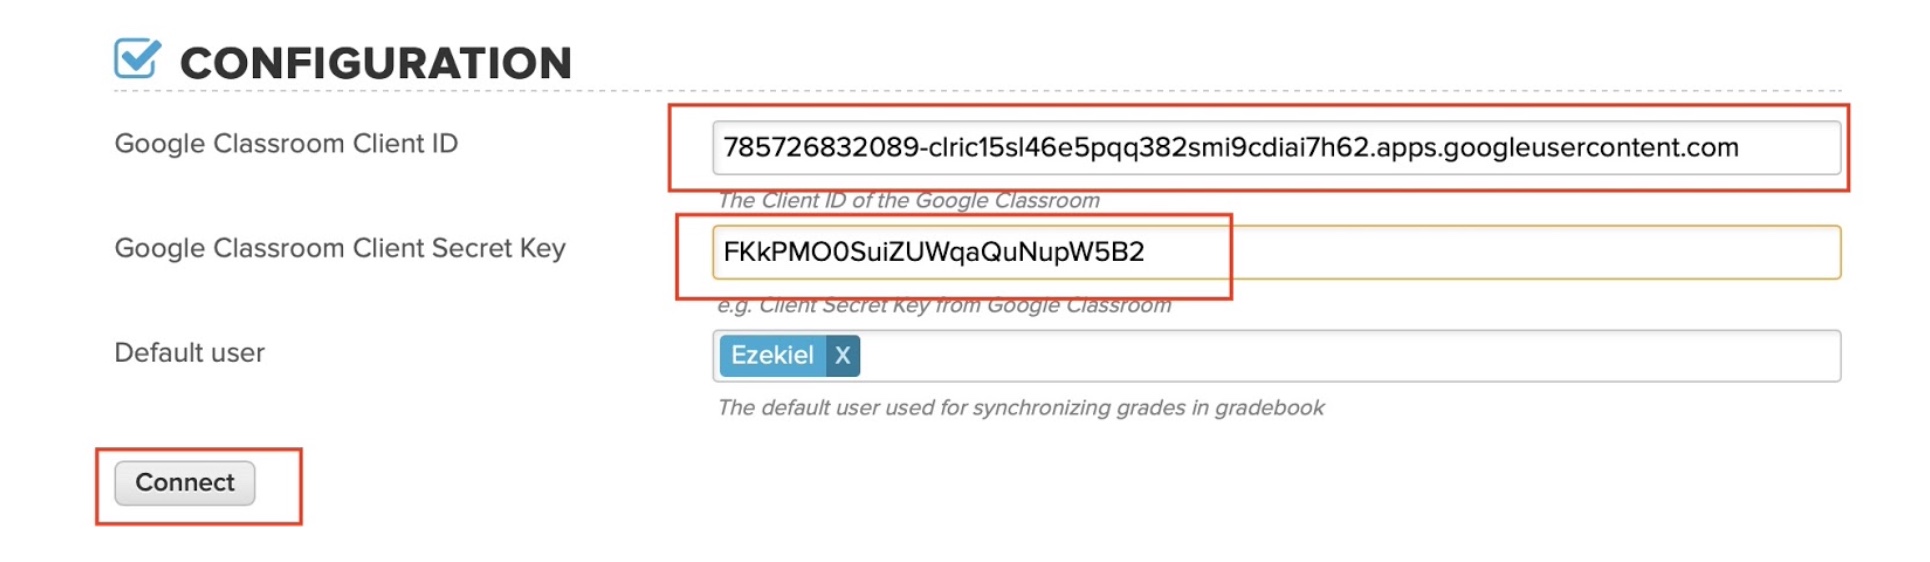
Click on “Connect” to test the connection. This will prompt you to log into Google, or to select your Google Classroom account.
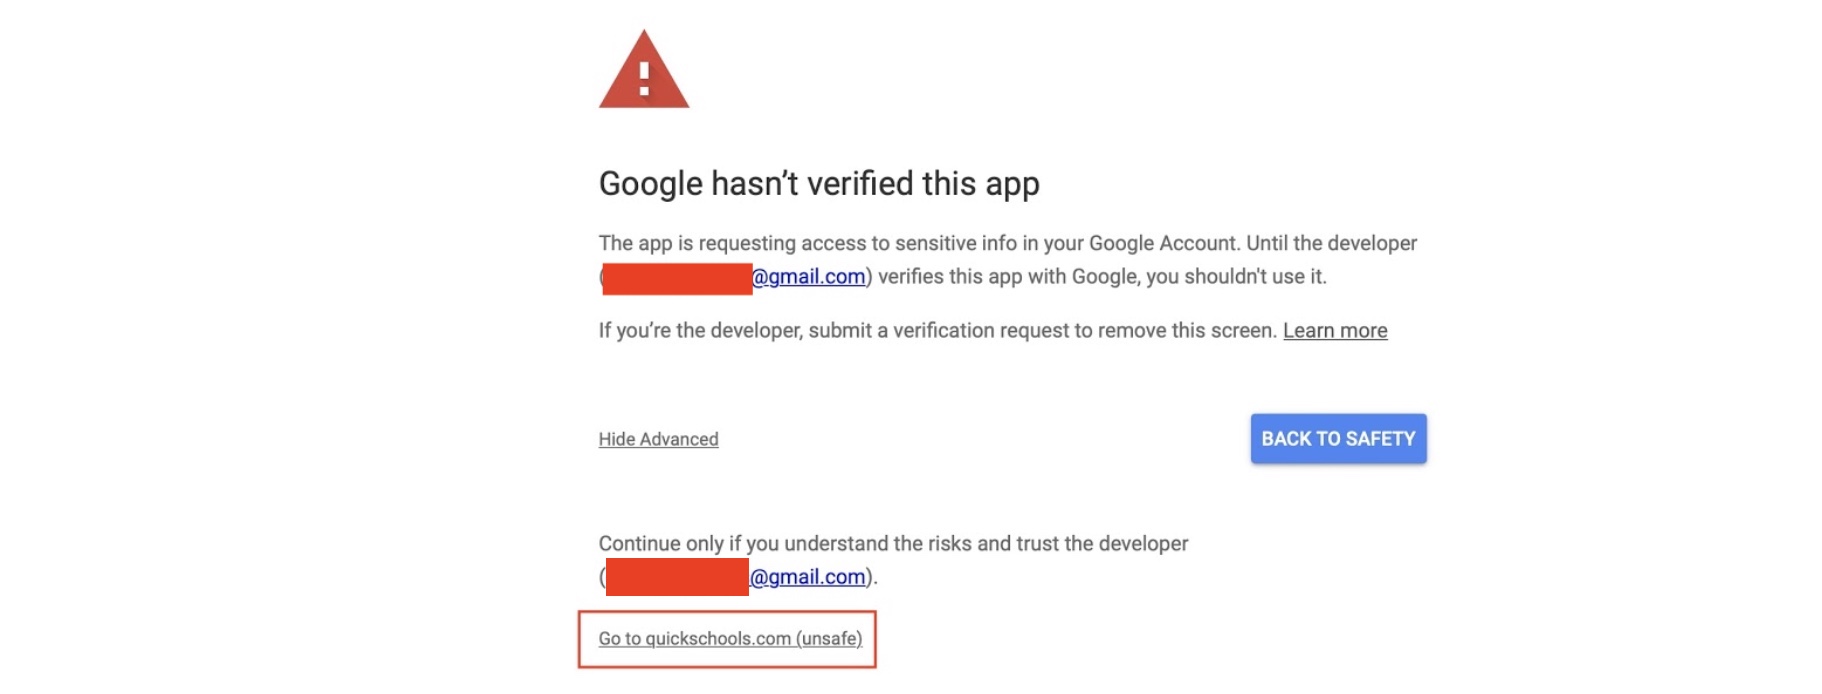
You may encounter the following screen. If so, click on “Advanced”, and click on “Go to quickschools”:
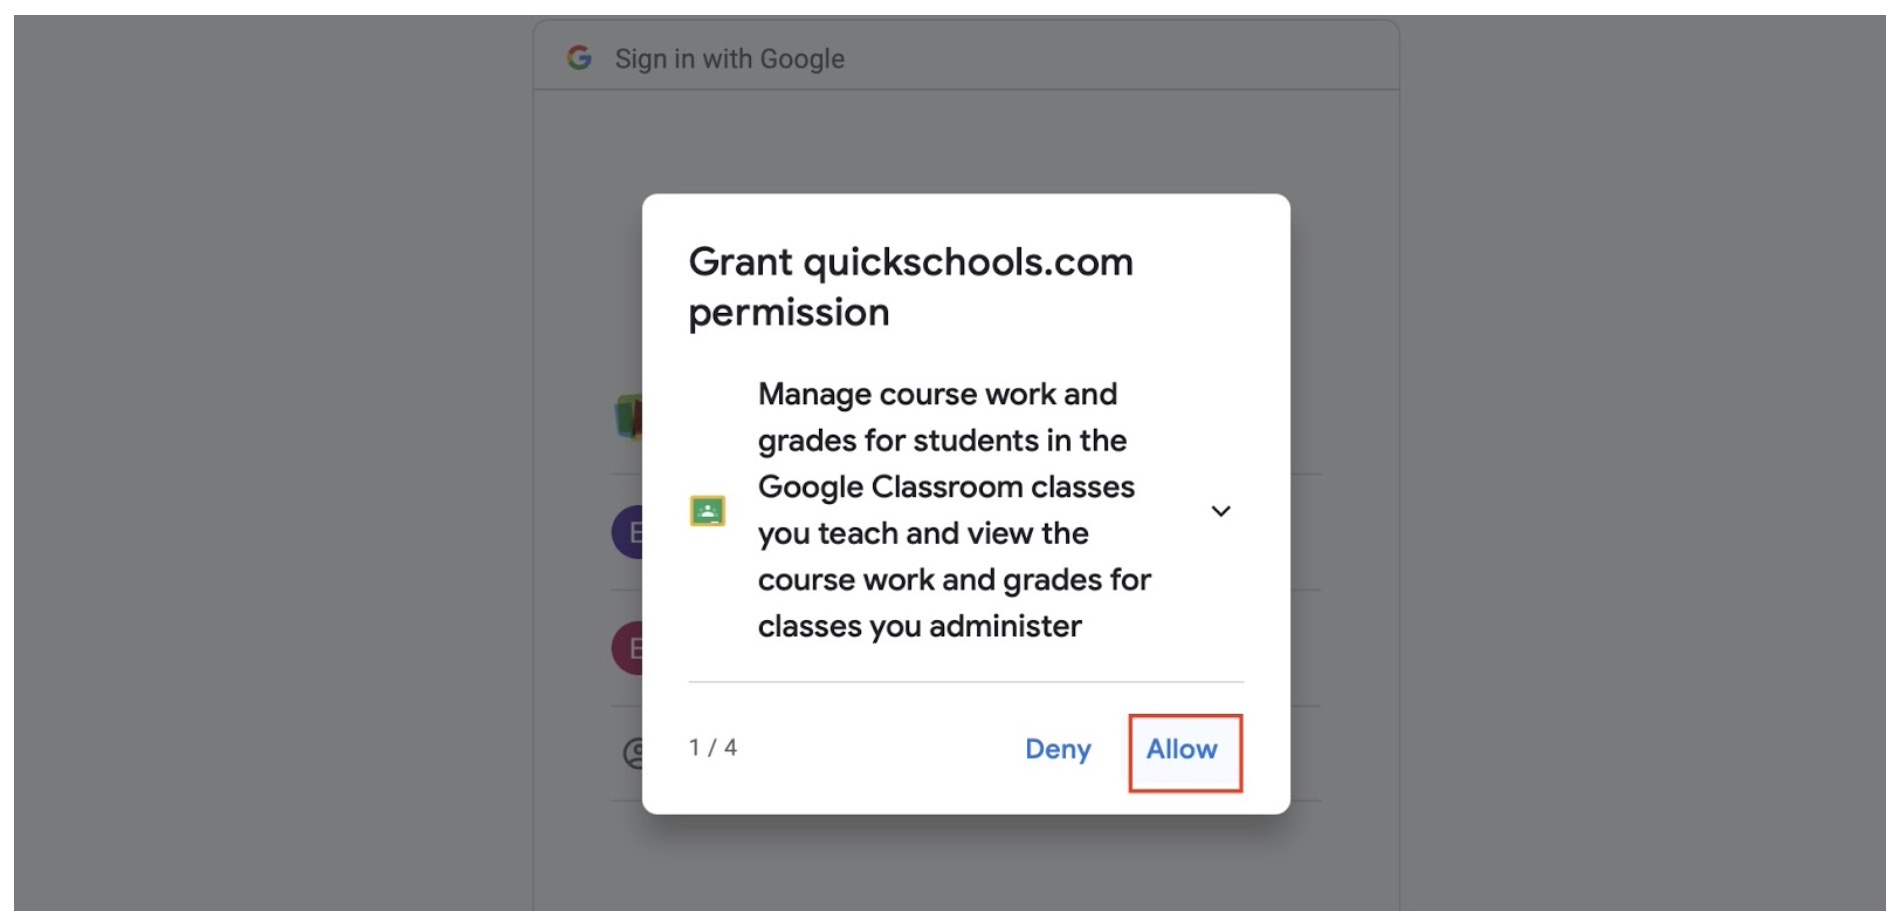
Click “Allow” for all prompts until you are back in Quickschools.
The connection between Quickschools and Google Classroom and now established. You can now review the steps found within the Google Classroom module to complete the mapping process.
19EE1028 | 20MR0403R