Setting up Zoom integration with Quickschools.
- Configure email notification in your school’s Zoom account
- Create Zoom OAuth app
- Set up Quickschools
Prerequisites:
- Make sure your school has a Zoom account. You can refer to https://zoom.us/pricing for plan details, pricing and limitations.
- Please send us an email at support@quickschools.com so we can make the “Live Streaming via Zoom” app available to your account.
A. Configure email notification in your school’s Zoom account
1. Log in to https://www.zoom.com/
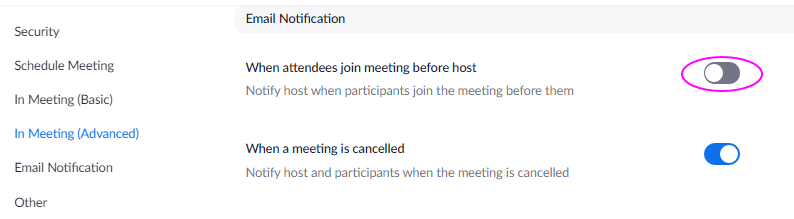
2. Go to Settings > Meeting > Email Notification
3. Turn off “When attendees join meeting before host” (since the Zoom account is for school wide, we don’t really need email notifications).
B. Create Zoom OAuth app
Each school needs to set up an OAuth app in Zoom for API call usage (refer to https://marketplace.zoom.us/docs/guides/build/oauth-app).
1. Login with your Zoom account to https://marketplace.zoom.us
2. Click Develop > Build App
3. Select General App > click Create
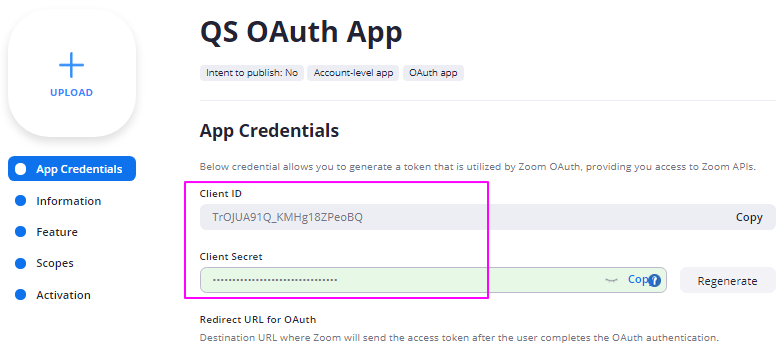
4. Take note of Client ID and Client Secret which are required to be configured in Quickschools.
5. For the Redirect URL for OAuth and Allow list URL, enter the school URL
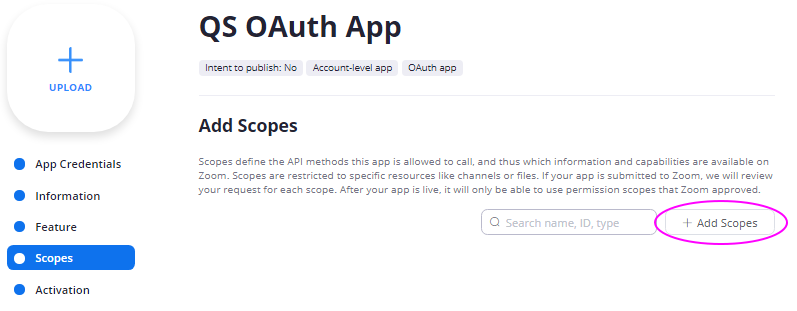
6. Click Scopes
7. Click the “Add Scopes” button
8. Select all options under Meeting and click Done.
9. Do NOT need to install or publish. We only need the app to be created to have the Client ID and Client Secret key.
C. Set up Quickschools to connect to Zoom
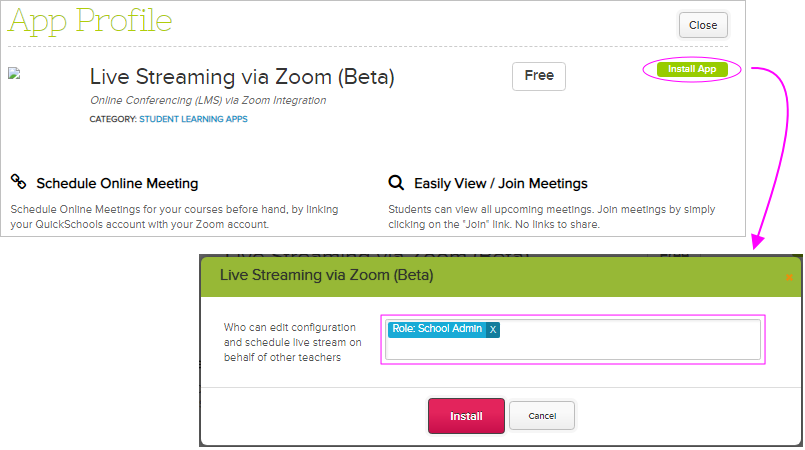
1. Log in to Quickschools, go to APP STORE, then search for “Live Streaming via Zoom (Beta)”
2. Click the “Install App” button, then enter the user/s who can configure the Live Stream app. Click the Install button.
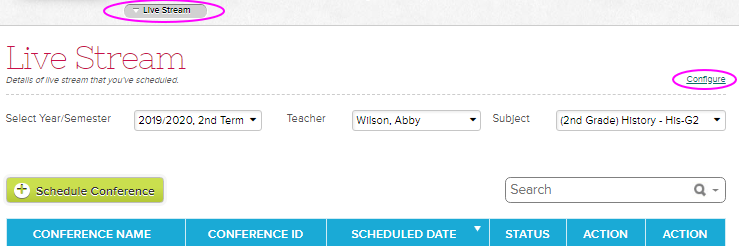
3. Go to Livestream tab and then click the Configure link.
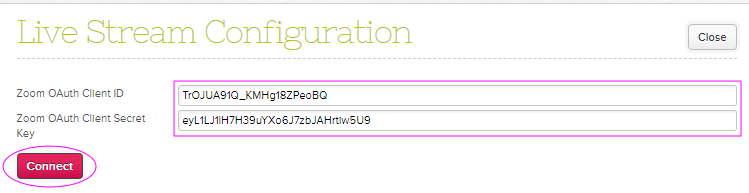
4. Enter the Zoom OAuth Client ID and Client Secret Key that you obtained from Step 2, then click the Connect button.
5. Check Allow this app checkbox and click the “Allow” button as the OAuth App requests access to your Zoom account:
You’re now all set to schedule online classes.
20QS0805