QuickSchools integrates with QuickBooks Online. This document describes how the two systems integrate
Overall Process
- General Overview
- Connecting to QuickBooks
- Before we Begin: Synchronizing Categories with Products
- STEP 1: Synchronizing Students with Customers
- STEP 2: Export Fees and Payments
General Overview
Pre-Requisites
In order to integrate from QuickSchools to QuickBooks, you will need the cloud-based version of QuickBooks, namely QuickBooks Online. QuickSchools will use the APIs offered by QuickBooks Online in order to establish the integration.
Typical Flow
We usually regard the SIS as the source for all information related to students, which you can then export to QuickBooks. This means that in the most common case, you will have student data in QuickSchools, but not in QuickBooks, after which you can simply export all data to QuickBooks.
Connecting to QuickBooks
Install the App
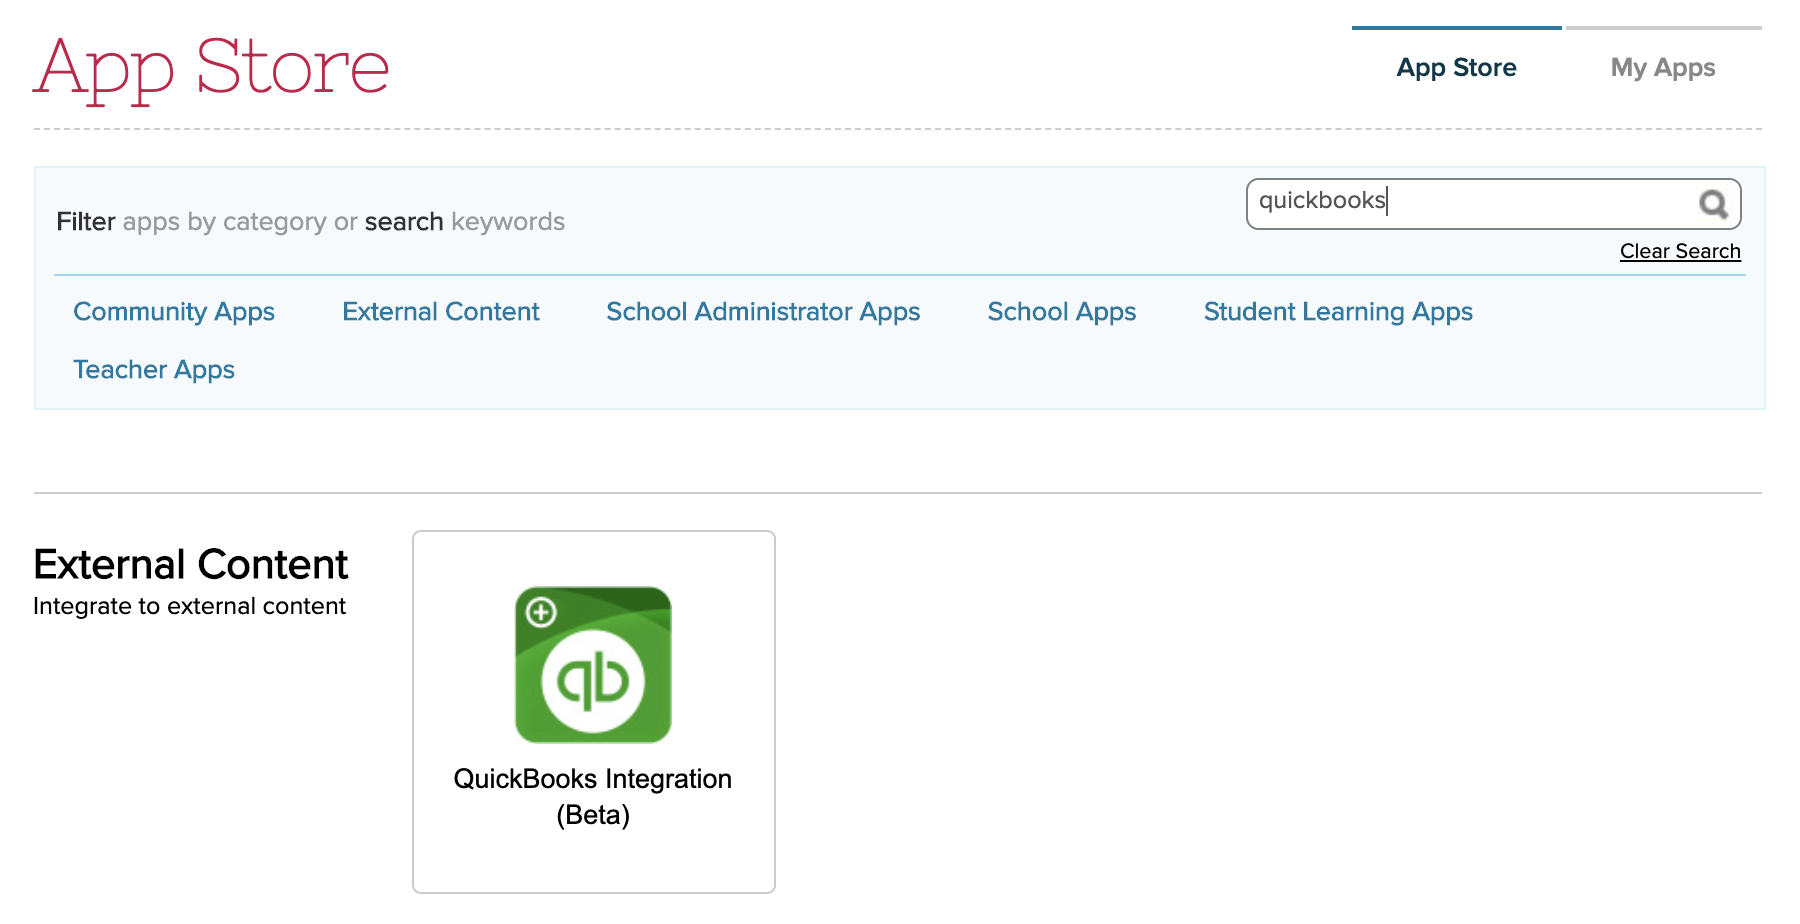
From your QuickSchools account, go to the “App Store”, find the “QuickBooks” App:
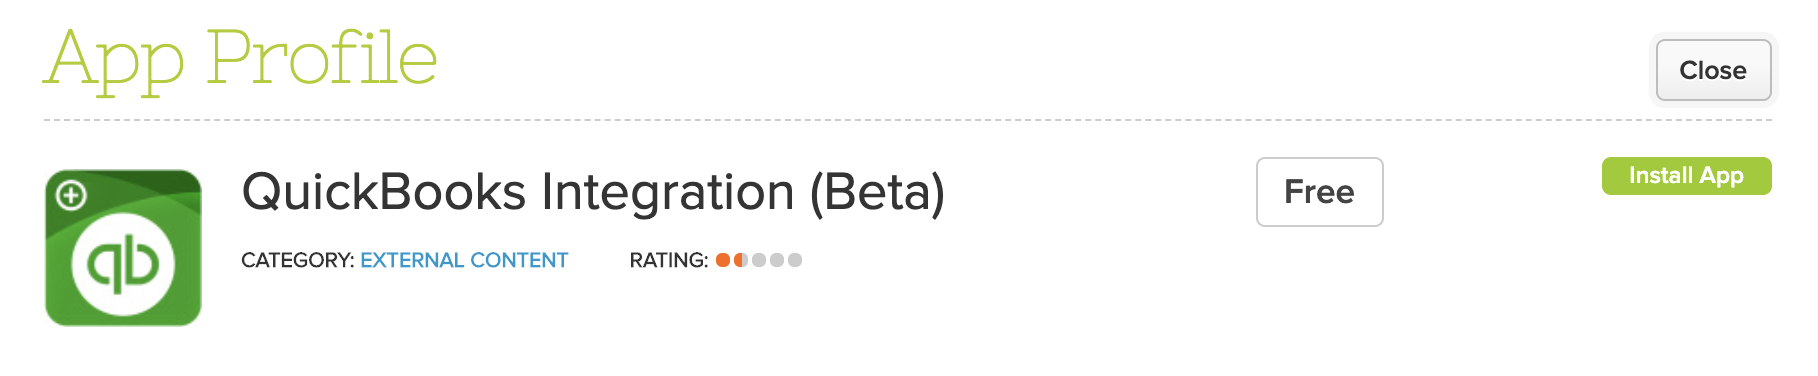
After clicking on the app, click on the “Install App” button:
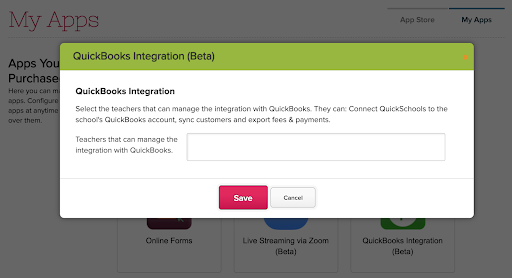
Finally, be sure to configure who should get access to setting up the configuration for integration, before clicking on “Install”:
Connecting to QuickBooks
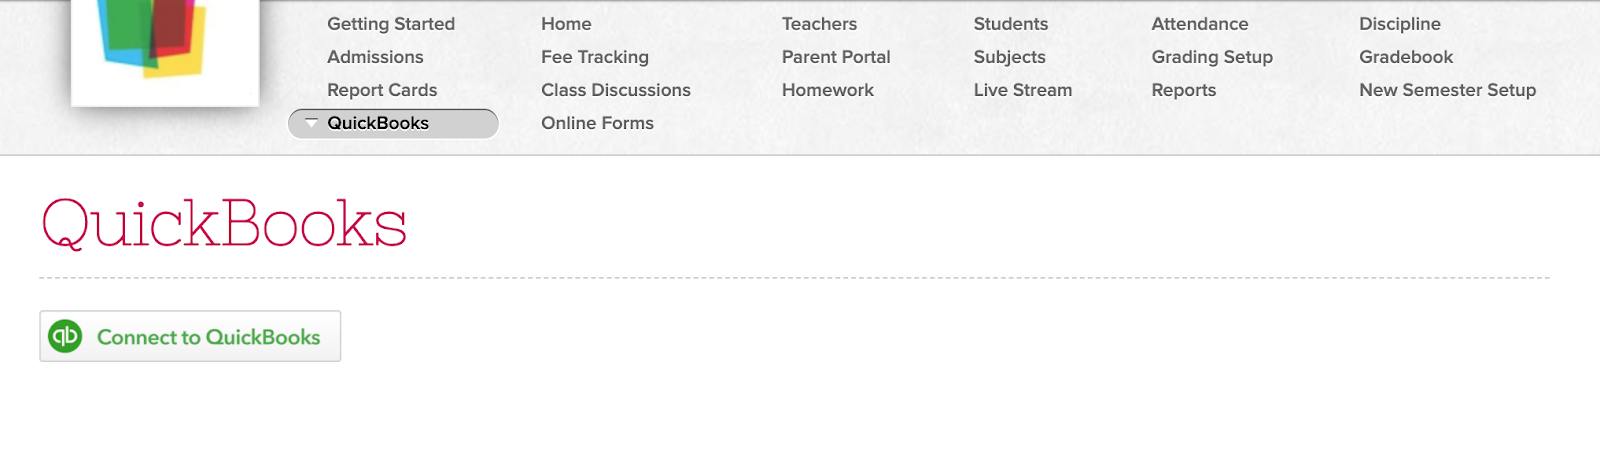
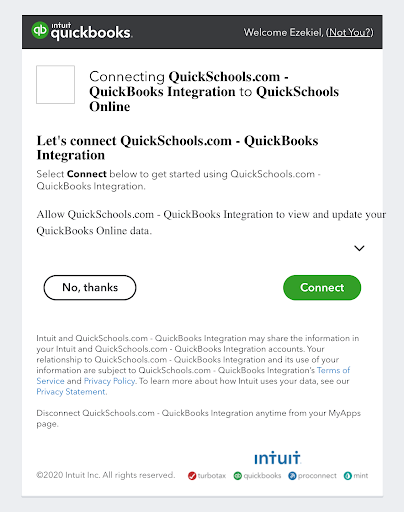
Once the app is installed, go to the “QuickBooks” app, and click on the “Connect to QuickBooks” button:
You will be redirected to QuickBooks to sign in. Once you’ve signed in, you’ll be asked to authorize the integration:
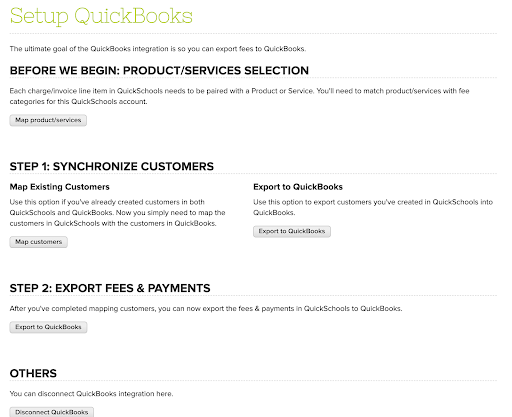
The QuickBooks app screen will then reload and display a bunch of options for mapping/exporting data from QuickSchools to QuickBooks:
Synchronizing Categories with Products
Before you can export the transactions, you’ll need to map the fee categories in QuickSchools for products in QuickBooks.
Enable Fee Categories
As the School Administrator, go to “Settings” > “Turn Features On / Off” and make sure the Fee Categories feature is enabled by configuring the Fee Tracking module:

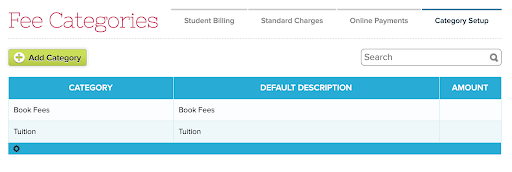
Once this module is enabled, you can start creating Fee Categories under “Fees Tracking” > “Category Setup”:
Set Up Products in QuickBooks
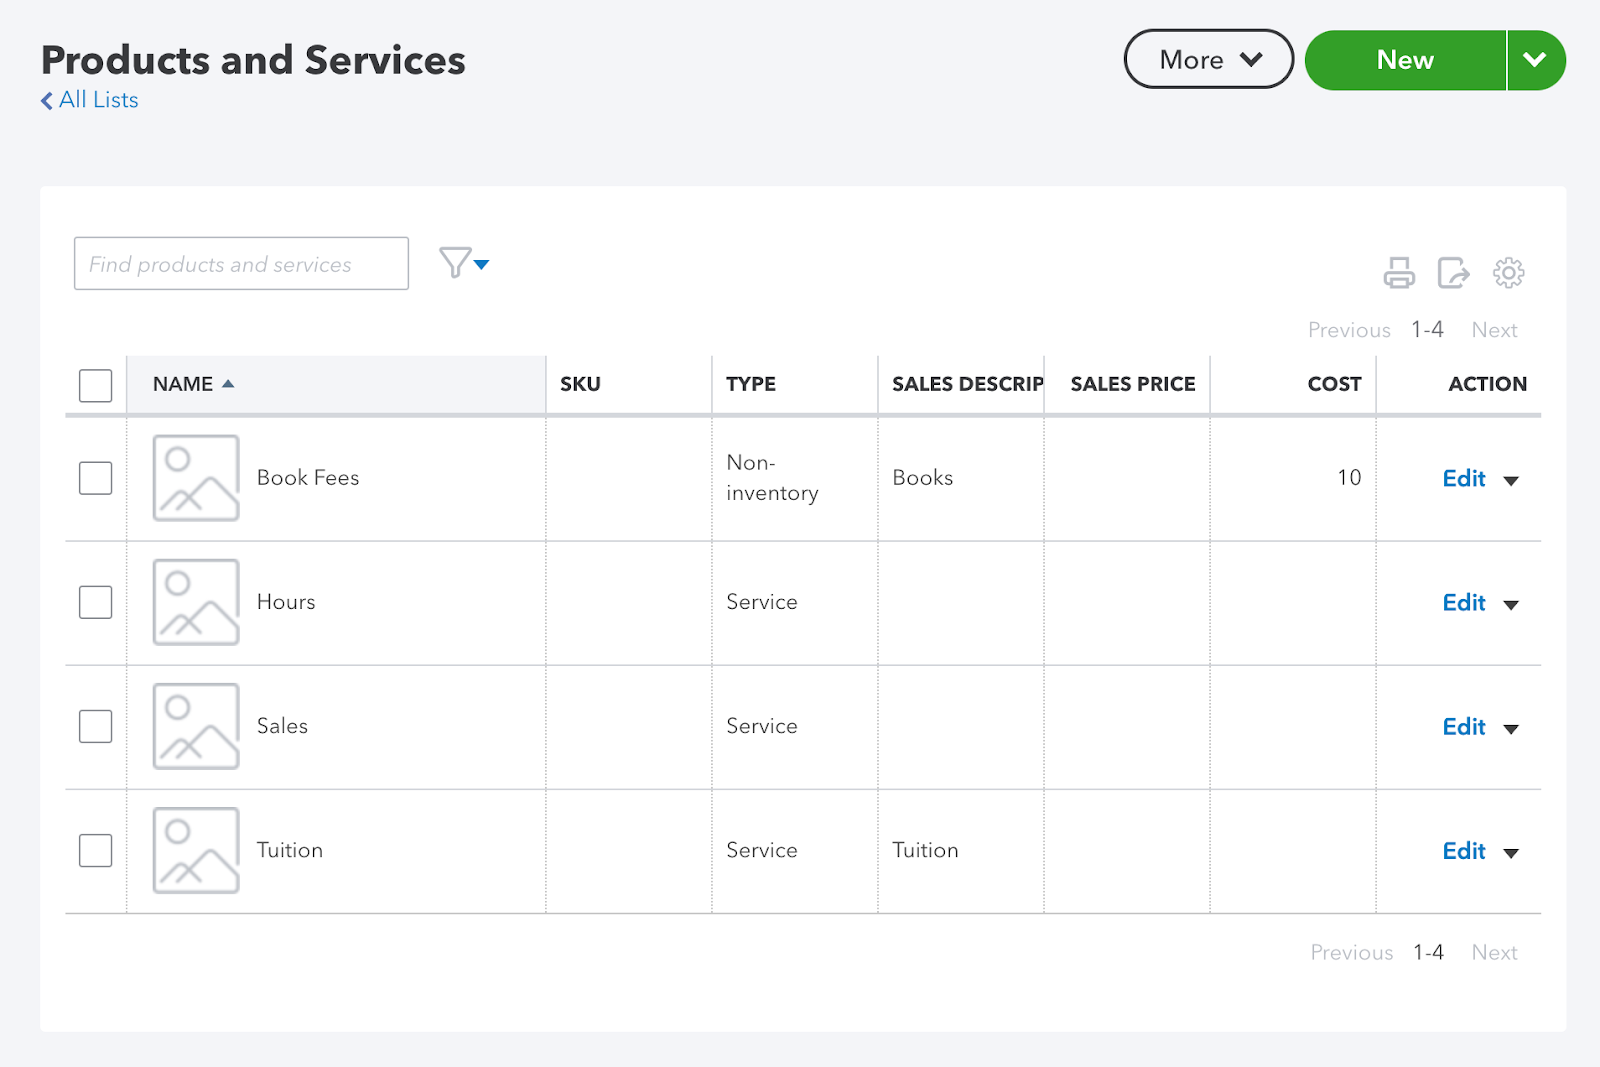
In QuickBooks, you can create Products under “Products and Services”:
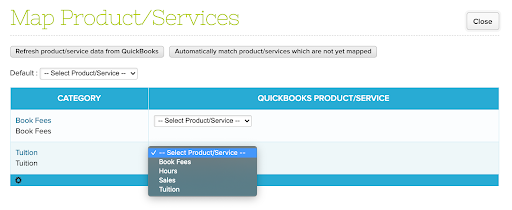
Map Categories to Products
Finally, from the QuickBooks Integration menu in QuickSchools, you can map the two entities together:
STEP 1: Mapping/Exporting Students
Mapping Students
The process for mapping students is pretty straight forward. Simply select a customer from the dropdown, and match them with a student in QuickSchools: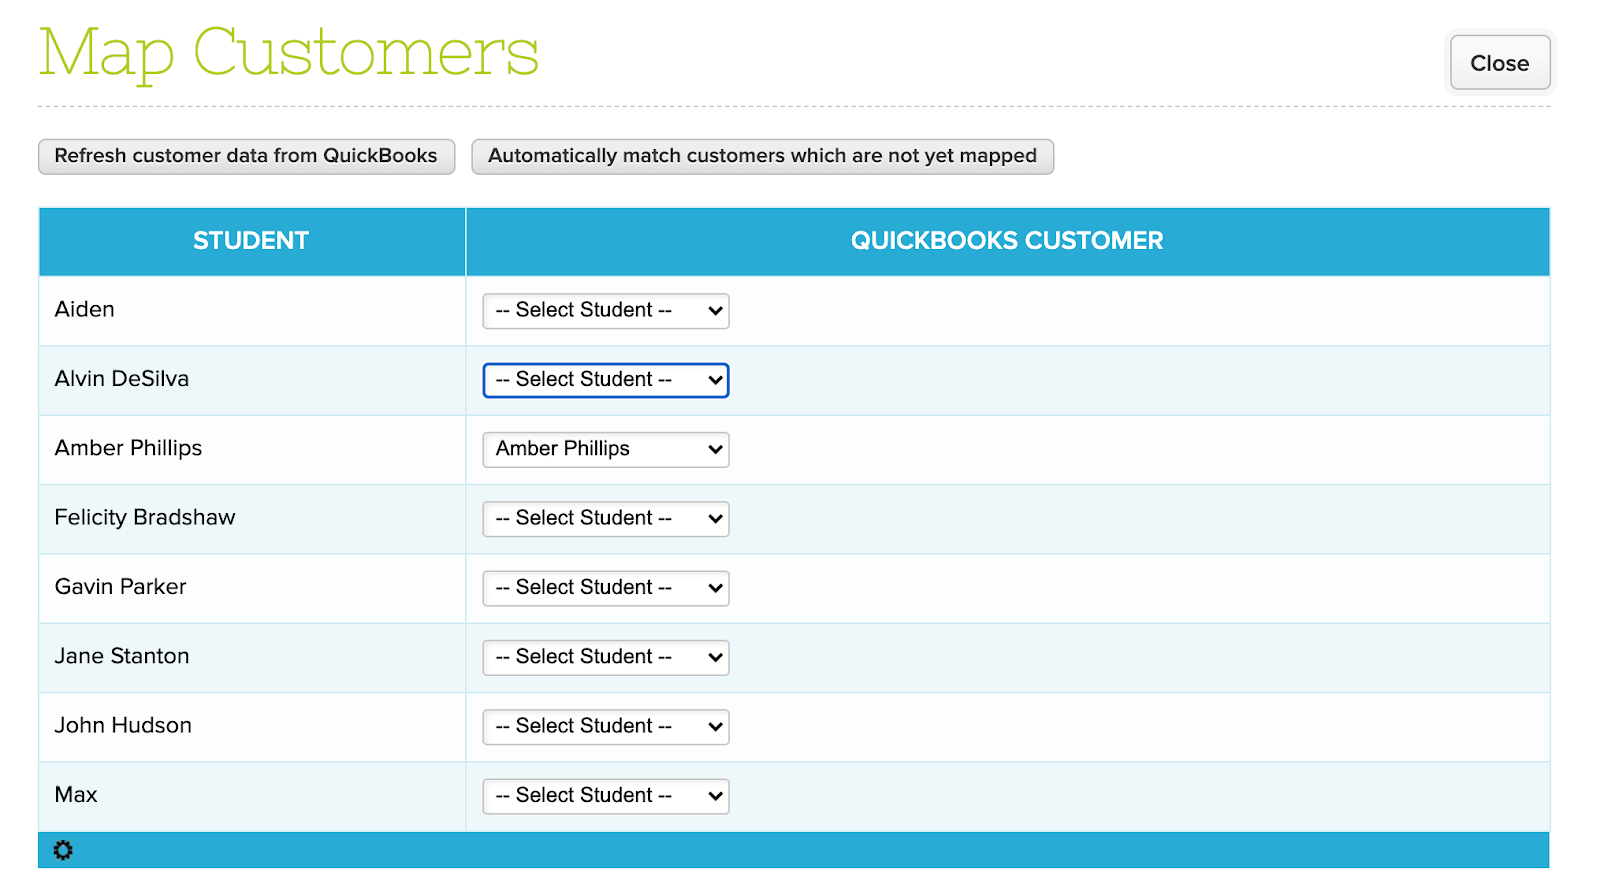
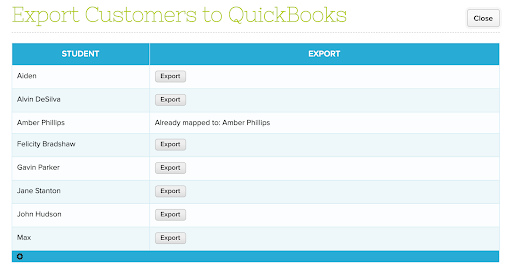
Exporting Students as Customers
You can also export students to QuickBooks as customers
STEP 2: Export Fees and Payments
Once you’ve mapped the fee categories and students, you’re ready to export fees and payments:
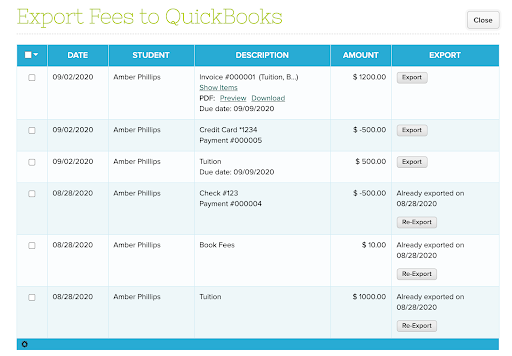
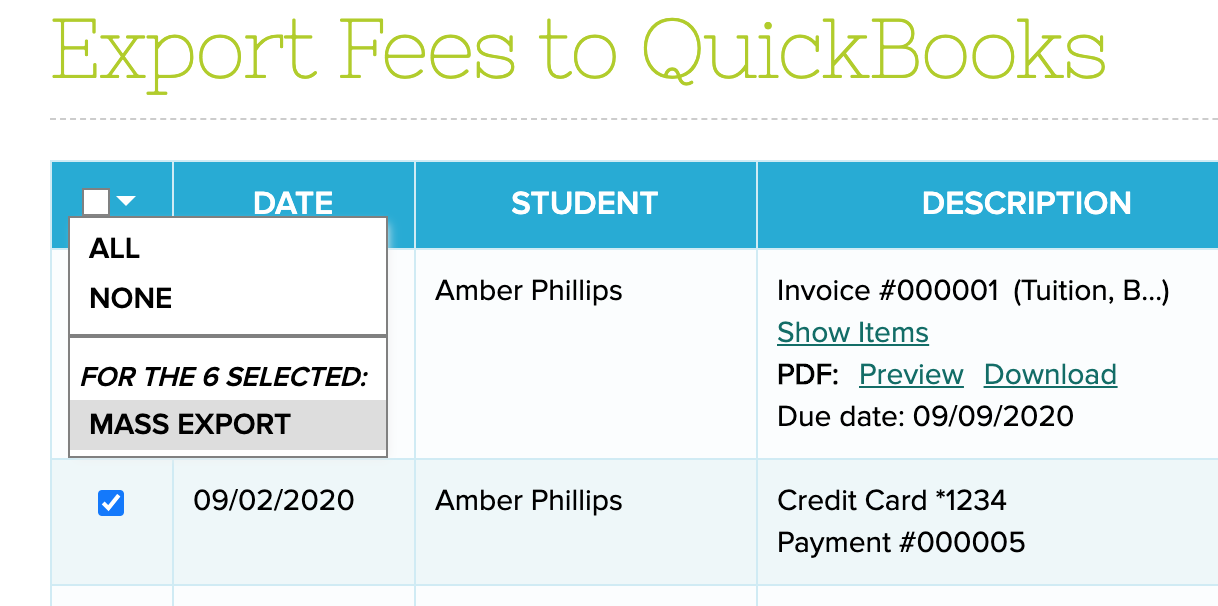
To export a transaction, simply click on the “Export” button. To bulk export, you can use the check boxes on the left, and select Export:
Please note that the “Re-Export” button will recreate the transaction in QuickBooks. You should only use this option if you’ve made changes in QuickSchools, and you’ve removed/deleted the original transaction in QuickBooks
Example Export
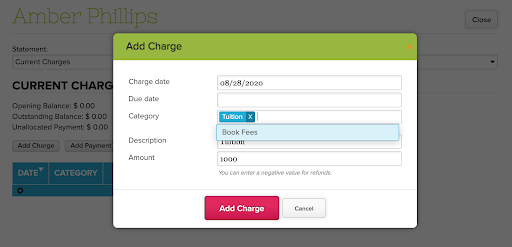
Here’s an example transaction created with a Tuition Category:
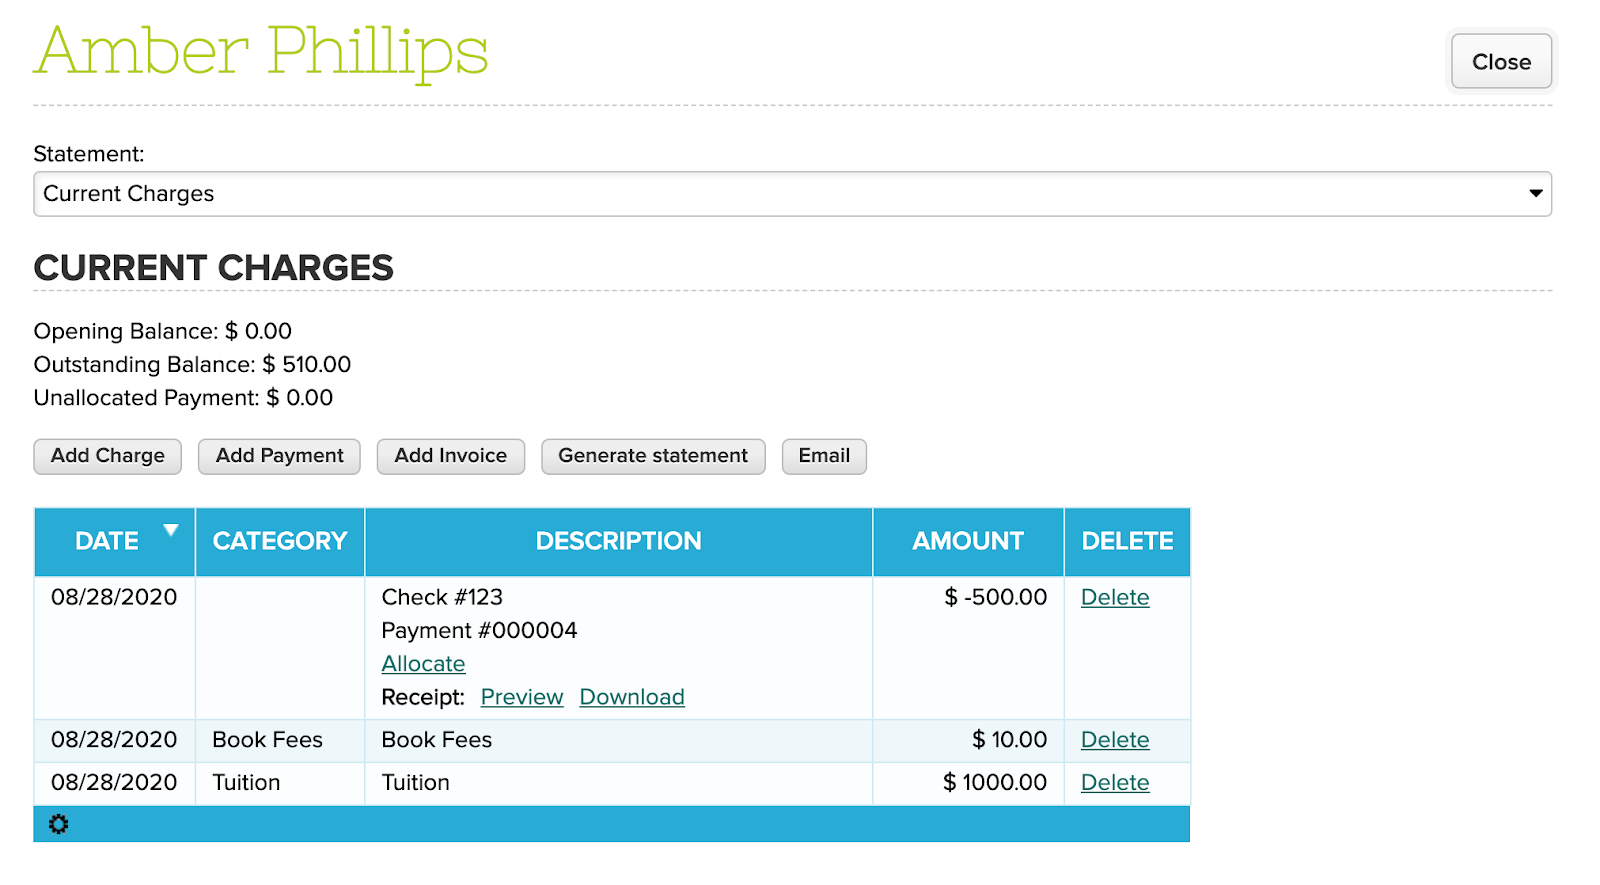
Here’s the same student with 3 transactions (2 charges and 1 payment):
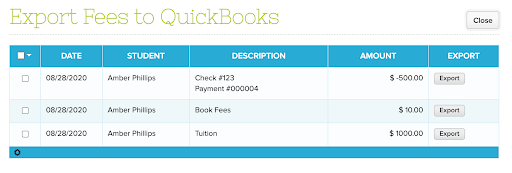
Here’s what the Export screen looks like:
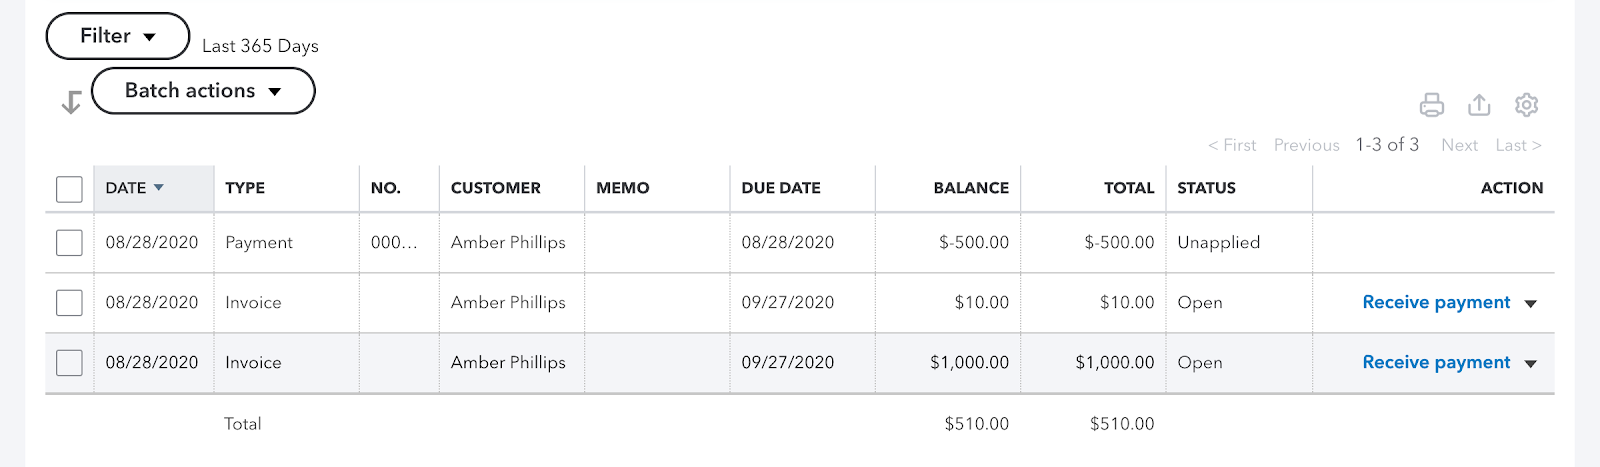
Here’s what the transactions look like in QuickBooks after a Mass Export
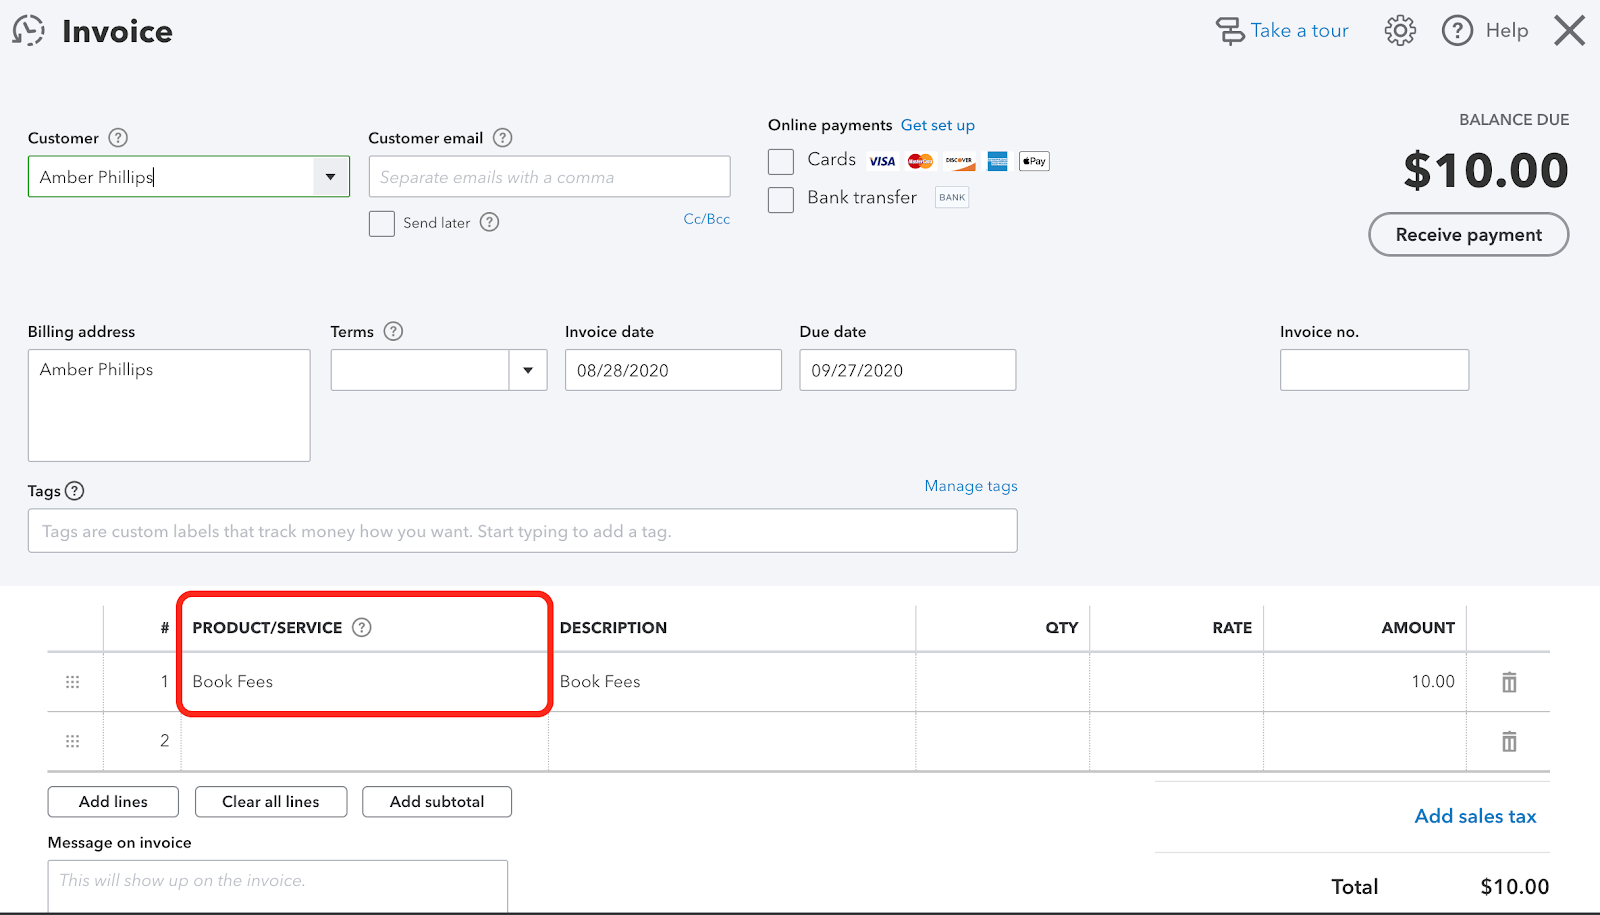
Clicking on a charge shows that the correct product has been applied, based on the fee category in QuickSchools:
20AK0902