The steps below show how to import Final Grade into multiple gradebooks in Quickschools. The Final Grades automatically appear in the student report card and transcript. This procedure is especially helpful for schools who need to enter historical grades.
These steps are actually similar to the normal gradebook import procedure, there are just changes in the import file and in the mapping.
Prepare Import File
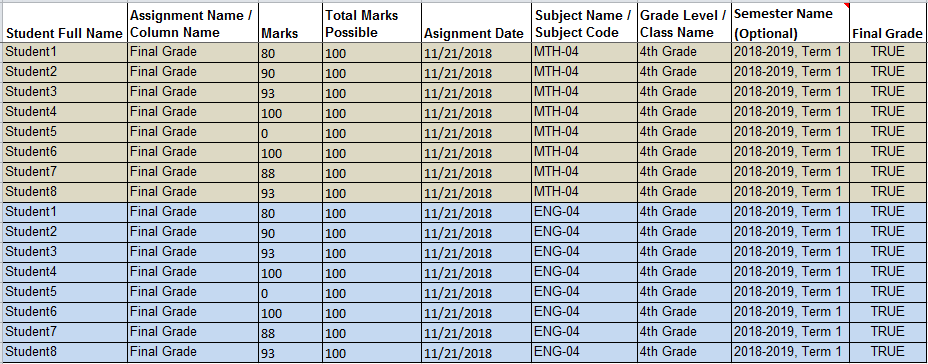
Before you can import, first you need to prepare the import file. It should have the following columns:
- Student Name
- Column / Assignment Name
- Column / Assignment Date
- Marks
- Total Marks Possible
- Subject Name / Subject Code
- Grade Level / Class Name
- Semester Name (optional, you only need this if importing to a non-active semester)
- Final Grade
Click here to download a sample of the import file.
Import Final Grades
- Go to Gradebook tab and click the Import button
- Browse for the excel file then map the fields accordingly
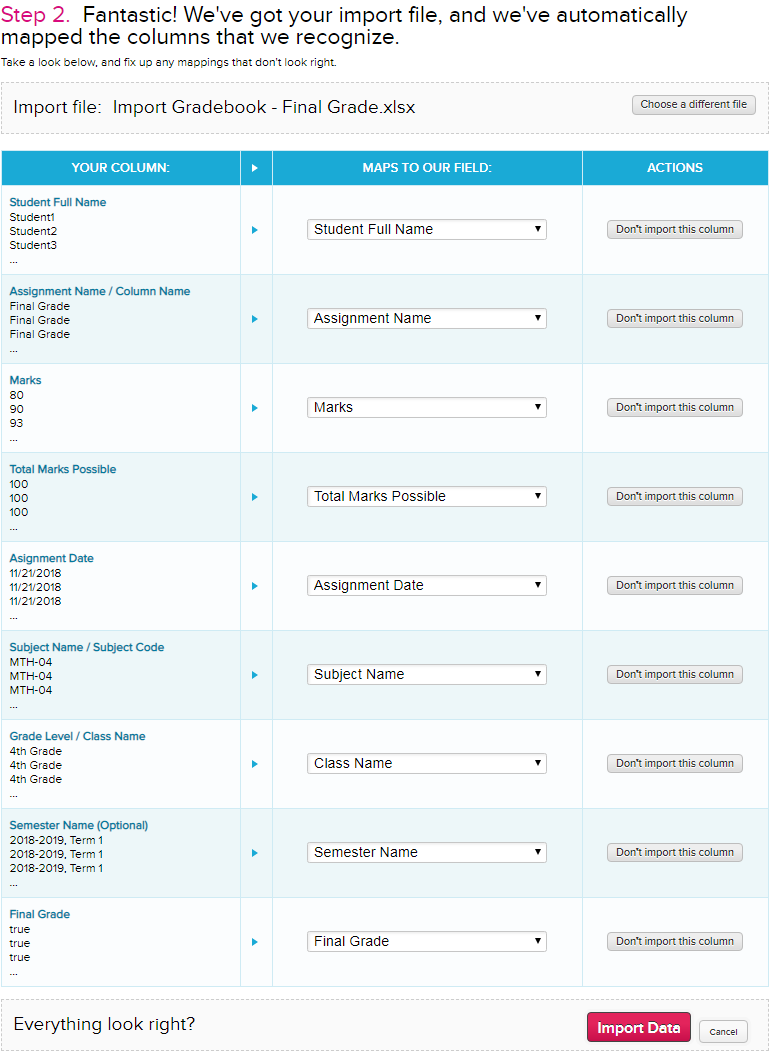
3. Click the “Import Data” button to initiate the import.
Confirm Import
Run a report to review the imported grades. Go to Reports tab and search for “gradebook”, this will show you the different reports you can run to confirm the import.
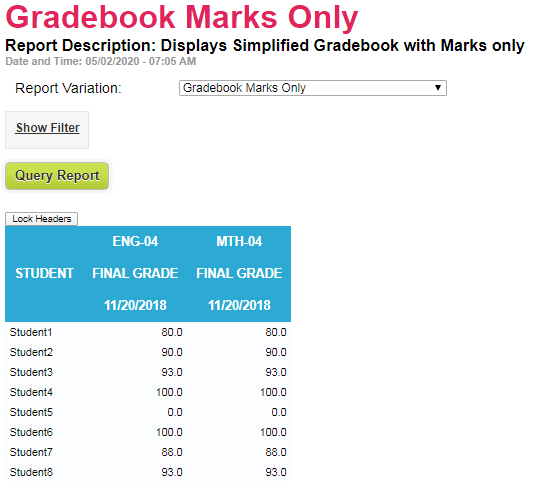
These are some of the reports you can run:
- Gradebook Data by Student (Concise version)
- Gradebook Marks Only
- Gradebook Marks and Grades
|
Few important notes:
|
If you need to import assignments, quizzes, etc. in your gradebook, please check out this article: Gradebook Import
20DP0501